
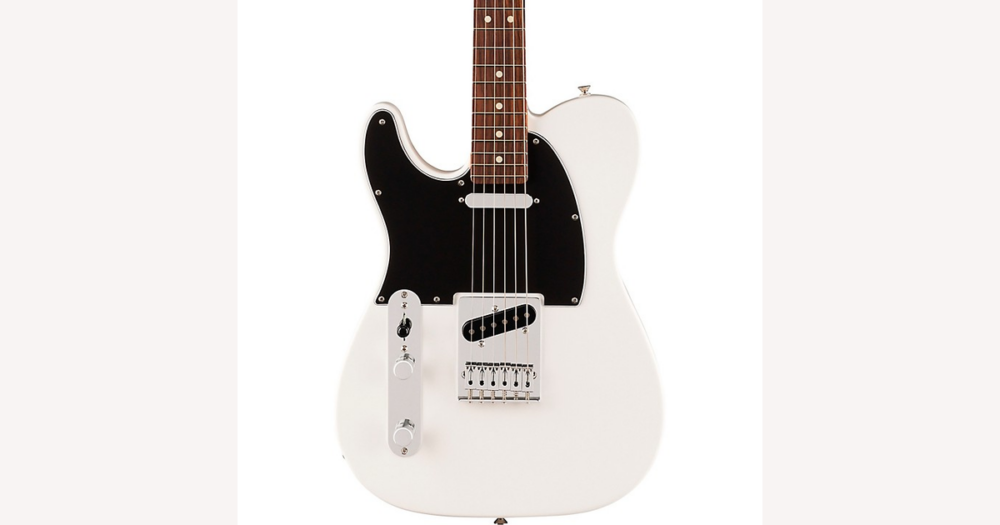
If you’re building or upgrading a left-handed Tele-style guitar, start by insisting on a neck that really matches the way you play: a left-handed Tele neck has reversed tuner layout, a nut cut for left-handed string order, and side dots on the edge you actually see, which makes orientation and day-to-day playing feel natural. On DHgate or any other marketplace, that kind of clearly left-handed Tele-compatible neck with honest photos and heel measurements is the safest choice, but some builders do repurpose flipped right-handed or Strat necks when they’ve checked fit and are willing to recut the nut and live with cosmetic oddities. This guide walks through those orientation options and the fit, spec, and DHgate buyer checks that keep a replacement neck from becoming an expensive mismatch.
What actually makes a Telecaster neck left-handed (and when a right-handed neck can work)
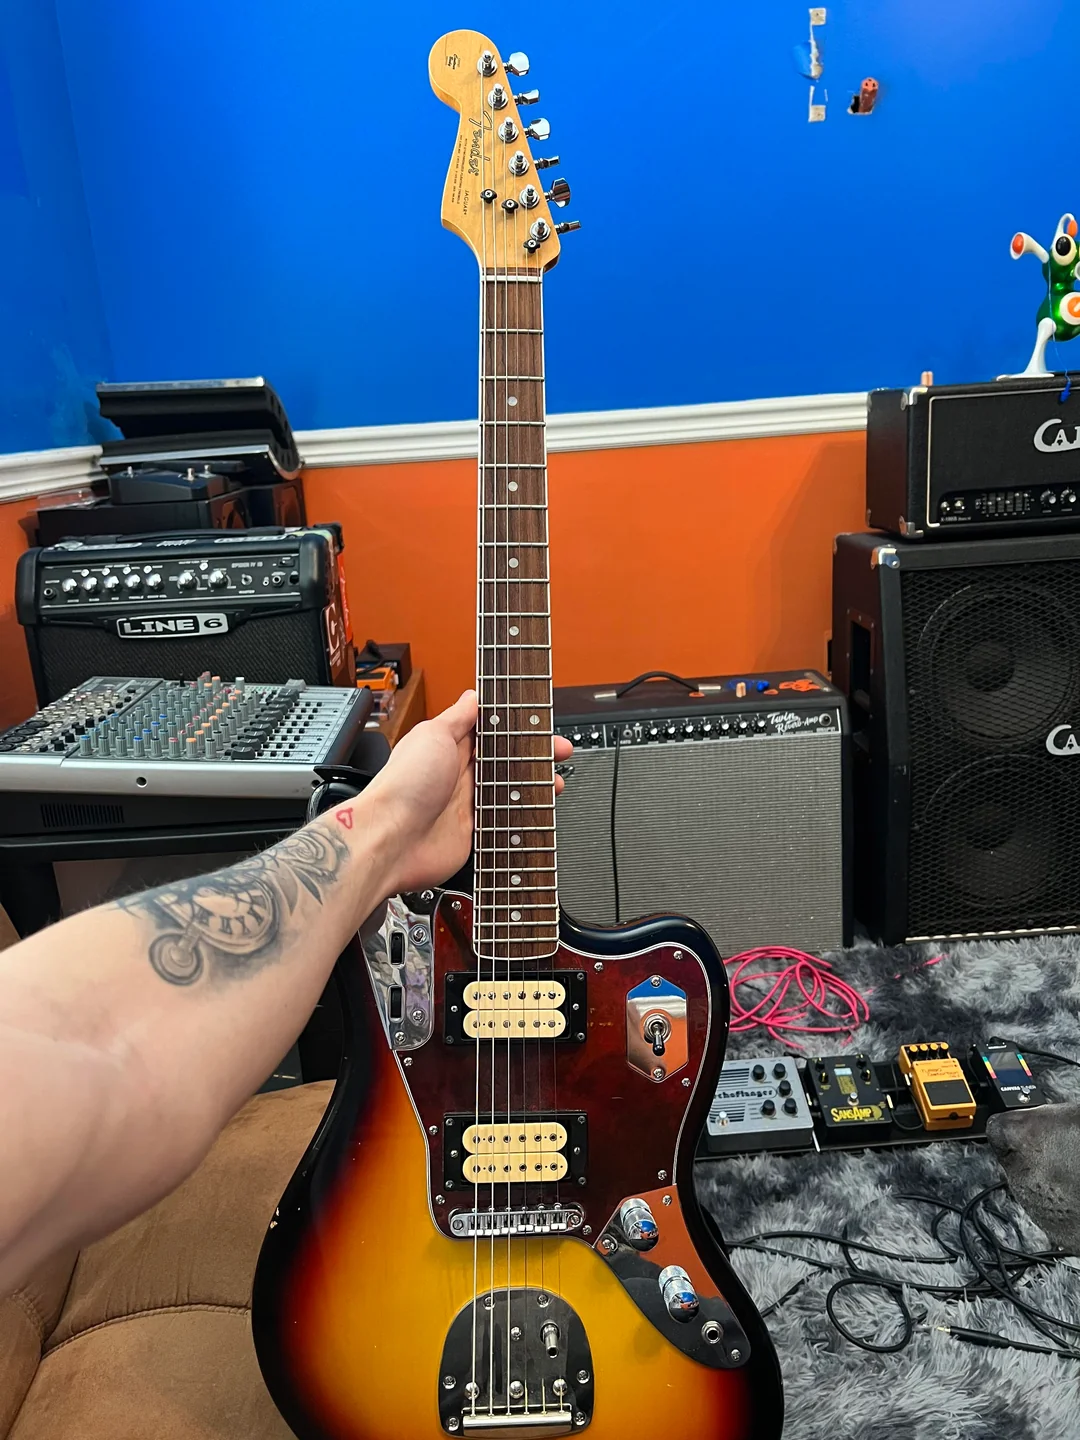
A true left-handed Tele-style neck has its tuners arranged for a left-handed headstock, the logo oriented correctly from the player’s side, and side dots visible along the upper edge of the fingerboard when the guitar is held in a left-handed playing position.
On a Telecaster-style neck, “left-handed” means more than a marketing label. The tuner layout on the headstock is reversed compared with a right-handed neck, the nut is cut for left-handed string order, and the side dots sit along the edge the player actually sees when fretting in a left-handed position. A purpose-built left-handed Tele neck also keeps the familiar Tele headstock silhouette and logo orientation looking normal on a left-handed body, which matters if you care about a classic look or future resale.
Many builders do successfully flip right-handed Tele or Strat necks for left-handed projects, but this is a workaround with clear compromises. To use a flipped right-handed neck, you typically need a new nut cut for left-handed string order, and you have to accept that the headstock logo is mirrored or upside down and that side dots may end up on the wrong edge unless the neck was made with dots on both sides. Depending on the neck design, flipping can also change how easily you reach truss rod adjusters or, in some cases, slightly alter how the neck feels because hardware and carve details are now reversed relative to your hands.
A flipped right-handed or Strat neck is only a reasonable choice when you’ve confirmed that its heel will physically fit your Tele-style body, you are comfortable paying for or doing a proper left-handed nut, and you don’t mind cosmetic quirks or minor setup complications. If you want a straightforward build with a recognizably Tele look and the least risk of orientation surprises, a clearly left-handed Tele-compatible neck with accurate photos and specs is the safer target—especially on a marketplace listing with limited support. Experienced DIY builders sometimes choose flipped or mixed-fit necks because they understand those trade-offs; if you’re less confident, prioritizing a true left-handed Tele neck is usually the better route.
Telecaster neck fit essentials: scale length, heel, and mounting pattern
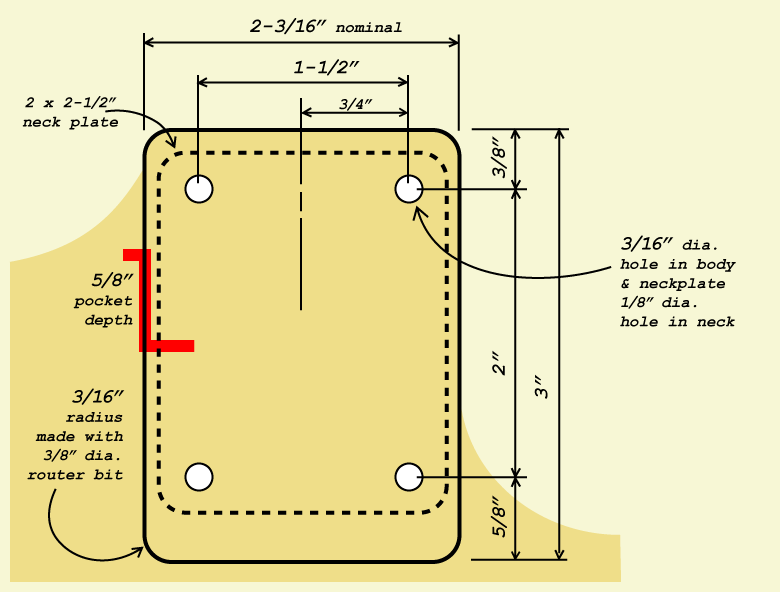
Diagram highlighting the Telecaster neck pocket: showing heel length and width, pocket depth, corner shape, and screw hole locations relative to the bridge and nut.
Most Telecaster-style builds assume a 25.5″ scale length, which is the distance from the nut to the bridge saddles. For intonation to work, the neck has to sit in the body so that the nut ends up the correct distance from the bridge; if the neck is pushed too far forward or back because the heel doesn’t match the pocket, the frets won’t line up with the bridge and the guitar will never intonate cleanly without major surgery.
The heel of the neck needs to match the body’s neck pocket closely in length, width, corner shape, and thickness. A heel that’s too long or short can shift the neck’s position and affect scale, a heel that’s too wide simply won’t go in, and one that’s too narrow may leave gaps that reduce stability or look sloppy. Pocket depth also matters: the heel should seat firmly so the fretboard height relative to the body and bridge feels normal, rather than leaving the strings unusually high or low.
Mounting screw holes tie all of this together. The pattern in the neck heel has to line up with the body’s holes so the neck clamps down squarely and keeps the bridge in the right place relative to the frets. When holes are off, you can end up with a neck that twists under tension, a scale that’s subtly shifted, or a repair that needs doweling and re-drilling. Because off-brand Tele-style bodies and necks vary, a replacement neck that is clearly labeled as Tele-compatible and shows detailed heel dimensions and hole locations in photos or specs is normally safer than a generic or vague listing, especially if you’re buying through a marketplace with limited hands-on support.
Measure your Tele body and match it to a neck listing
- Measure the neck pocket’s internal length: place a ruler or tape against the inside front edge of the pocket and measure straight to the end of the pocket, then note the value.
- Measure the neck pocket’s internal width: measure across the opening at its widest point and note whether the corners are square or rounded, since a heel with a different corner shape may not seat cleanly.
- Measure approximate pocket depth: measure from the top surface of the body down to the pocket floor so you can compare this to a neck’s heel thickness and avoid an unusually high or low string height.
- Measure the distance from the end of the neck pocket to the bridge saddles’ intonation point: use this as a sanity check that a typical 25.5″ Tele-scale neck will place the nut in roughly the right position on your body, keeping in mind that some off-brand bodies can deviate.
- Measure center-to-center spacing of the body’s neck mounting screw holes: record the distances between holes and sketch the pattern so you can compare it directly with a neck heel’s drilled holes or drilling template.
- Write all of these measurements down and compare them to any neck listing’s heel length, width, thickness, and screw pattern; if those specs or clear measurement photos aren’t provided, treat that as a prompt to message the seller for exact numbers or skip the neck rather than guessing.
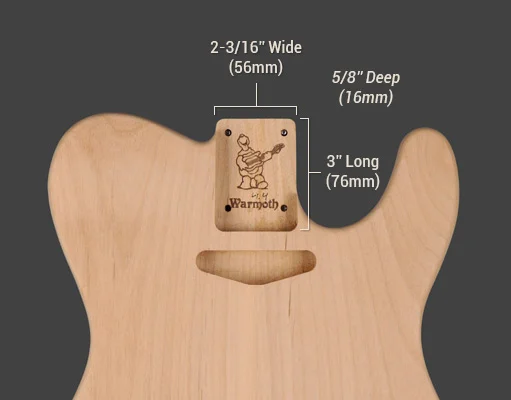
Use the diagram to match where you place your ruler: measure pocket length and width inside the cavity, pocket depth from the body surface down, and the spacing and layout of the neck screw holes relative to the bridge area.
Neck feel specs: profile, radius, frets, and finish
Once you know a neck will physically fit, the next decision is how it feels in your hand. Tele-style necks are often described by profile labels like C, modern C, U, and V, plus informal terms such as “baseball bat” for very thick necks. A C or modern C profile tends to feel more rounded and moderate, suiting many players who want a comfortable, familiar grip. U and V profiles have more pronounced shoulders or a slight ridge along the back; some players love the extra support, while others find them bulky. Thicker necks can feel more substantial and can be easier to hold for some hands, but they may feel fatiguing if you prefer a slim, fast-feeling neck. Preference is inherently subjective, so treat these labels as a shorthand for shape rather than a guarantee you will like them.
Fingerboard radius describes how curved the playing surface is. Vintage-style Tele necks often use a tighter radius around 7.25″, which can feel very natural for chord work near the nut. Modern Tele necks commonly move to 9.5″, while some aftermarket options go flatter, around 12″ or more. Flatter radii can make wide bends feel a bit smoother and reduce the sense of “rolling off” the edges high up the neck, but some players miss the rounded feel for rhythm work. These differences change the feel of chords and bends rather than promising specific speed or technical performance.
Fret size affects how much metal your fingers encounter. Vintage frets are typically lower and narrower, which can feel more subtle under the fingertips and may encourage a lighter touch. Medium jumbo is a popular compromise, offering enough height and width to make bending feel easy without feeling excessively tall. Jumbo frets are larger and can make it easier to get a grip on the string for bends, but some players notice intonation issues if they press very hard or simply dislike the taller feel. Fret count (for example, 21 versus 22 frets) mostly changes how far the board extends toward the bridge and whether you have an extra high fret available, not the basic day-to-day feel.
Finish plays a big role in neck comfort. Satin finishes are usually described as smooth and low-friction, which many players prefer if their hands sweat or they dislike the slight drag of a gloss surface. Gloss finishes can feel slick and visually classic, but some players find they feel a bit sticky during long sessions. None of these specs behave differently because the neck is left-handed: profile shape, radius, fret size, and finish are simply mirrored for a lefty build, and the same comfort trade-offs apply.
When you read spec charts for a left-handed Tele neck, use them as a comfort guide rather than a promise. If possible, compare the listed profile, radius, and fret size to necks you’ve already played or ask a trusted tech how those specs typically feel. I would prioritize a profile, radius, fret size, and finish that sound comfortable and familiar over chasing theoretical tone or speed claims; a neck that feels good in your hands is far more important than a spec that looks impressive on paper.
Materials and construction: wood, fingerboard, truss rod, and finish quality
For most Tele-style necks, maple is the standard neck wood. It’s relatively hard, holds frets well, and tends to show wear as small darkening or dents rather than deep grooves. Fingerboards are commonly either maple (often finished in the same color as the neck) or a darker wood such as rosewood or similar species. Maple boards usually look brighter and show dirt and wear more visibly, while darker boards hide marks a bit better but can show string grooves over time if the wood is softer.
A one-piece maple neck has the fingerboard and back carved from the same blank, with the truss rod installed from the rear or front and the playing surface finished as part of the neck. A maple neck with a separate fingerboard adds a glued-on board of maple, rosewood, or another similar wood. In practice, this mainly changes appearance—the seam line, color contrast, and how the finish is applied—and sometimes how easy it is to refret or level the board. It’s better to treat these differences as cosmetic and maintenance-related rather than expecting a specific sound change from a particular construction style.
Truss rod access is worth checking on any left-handed Tele neck. Common designs adjust at the headstock, with the adjuster just behind the nut slot, or at the heel, where it is recessed into the end of the neck near the pocket. Headstock access is generally more convenient because you can tweak relief without removing the neck. Heel-adjust designs may require loosening the neck screws or taking the neck off the body for larger changes, which adds time and risk of finish damage if the pocket is tight. On marketplace listings, make sure photos clearly show where the truss rod adjusts and that this location will be practical for you or your tech.
Finish quality affects both durability and feel. A well-applied finish—whether satin, gloss, or something in between—should resist chips, flaking, and rough patches along high-contact areas like the first few frets and the back of the neck. Poor finish work can leave ridges at fret ends, sticky spots, or thin areas that wear through quickly. Over years of playing, a stable finish helps the neck stay smooth and comfortable, while rough or uneven finishing can make the neck feel scratchy or slow.
Marketing around exotic woods, “premium” labels, or special finishes often implies big tonal upgrades, but evidence for precise sound differences is limited and highly subjective. When you’re buying through a marketplace like DHgate, it’s safer to prioritize clear construction details—what wood is used, whether the fingerboard is separate or one-piece, where the truss rod adjusts, and how the finish actually looks in close-up photos—over vague claims about tone. Left-handed orientation doesn’t change these priorities: the same materials and construction trade-offs apply, just mirrored, so you should still focus on clearly described construction, reliable adjustment, and honest, detailed photos rather than relying on promotional descriptions of wood species or “vintage tone.”
Tele-spec vs generic and Strat necks: how far can you stretch compatibility?
Factory-style Tele-spec replacement necks are built to closely follow standard Telecaster dimensions: a heel sized to match typical Tele pockets, a screw pattern aligned with Tele neck plates, and a 25.5″ scale designed to intonate correctly with Tele-style bridges. When a neck is clearly described as Tele-spec and accompanied by detailed measurements and photos, it’s usually the lowest-risk option, because you’re working within a known design that many bodies and hardware sets are built around.
Generic Tele-compatible necks often claim they will fit Tele bodies but provide fewer hard numbers or rely on broad phrases like “fits most Tele-style guitars.” These can still work well, especially if the seller lists heel width, thickness, and screw spacing, but they introduce more uncertainty. With a generic neck, you’ll want to compare your own body measurements carefully to the listing, ask for exact dimensions if they’re missing, and accept that small variances in pocket or heel shape might require shims or professional setup to get a snug, stable fit.
Strat necks on Tele bodies are a common experimental combination. Many builders report that Strat necks often share the same scale length and similar heel width with Tele bodies, so they can bolt on and play in tune. However, there are caveats: some Strat heels are slightly differently shaped, which can leave small gaps or overhang; screw spacing can vary enough that existing holes don’t line up perfectly; and the visual line of the heel and fingerboard may not match the Tele pocket as cleanly. These issues don’t always make the build impossible, but they can add cosmetic quirks and extra setup work to ensure the neck seats correctly.
Left-handed projects stack orientation and fit complexity together. You may be combining an off-brand Tele-style body with a marketplace neck and then mirroring the whole setup for left-handed playing. In that scenario, every undocumented detail—heel shape, screw pattern, side-dot placement, truss rod access, and even how the headstock is drilled—creates more room for surprises. A clearly Tele-labeled left-handed neck with verified heel dimensions, mounting pattern, and close-up photos is therefore the safest choice for most buyers, especially when you can’t easily return an experimental part or redo major woodworking yourself.
Because of this, I would generally prioritize a Tele-spec left-handed neck with solid measurement data and construction photos over a generic or Strat neck when buying through a marketplace like DHgate. Generic Tele-compatible or Strat-on-Tele combinations can be rewarding if you’re comfortable with extra fitting, shimming, or cosmetic compromises, and ideally if you have access to a skilled tech. But outside Fender’s own guidance, many compatibility claims are anecdotal and depend heavily on individual parts. Treat these experimental paths as higher risk, plan for possible professional setup or modification, and stick to well-documented Tele-spec left-handed necks if you want the most straightforward, low-drama upgrade.
Common online pitfalls when choosing a left-handed Tele neck
- Treat unclear left/right orientation as a risk: if listing photos don’t clearly show the headstock from the playing position, tuner layout, side dots, and nut, you can’t be sure the neck is truly left-handed. This can lead to a neck that feels backwards in use or requires replacement parts and setup to work at all.
- Avoid listings with missing or copy‑paste specs: generic text that repeats “fits most Tele-style guitars” without heel length, width, thickness, or screw spacing increases the chance the neck won’t bolt on cleanly or align to the bridge for correct scale and intonation.
- Be cautious about vague or non‑Tele mounting hole patterns: photos that hide the heel, show holes that don’t match typical Tele neck plates, or offer undrilled heels without clear guidance can mean extra woodworking, re‑drilling, or a neck that never seats securely in your pocket.
- Don’t assume the factory nut is ready for left-handed string order: many marketplace necks ship with nuts cut for right-handed setups or very rough slots, so they may need a new nut and full setup before the guitar plays comfortably and stays in tune.
- Message the seller whenever heel measurements, screw spacing, or orientation details are missing or confusing: ask for specific dimensions and close‑up photos of the heel and headstock, then compare their answers to your own measurements and expectations.
- Walk away from vague or inconsistent replies: if the seller won’t provide clear measurements, avoids showing the heel, or gives specs that contradict the photos, treat the listing as high‑risk and skip it rather than gambling on major rework or a part you can’t use.
- Keep a cautious bias: forum anecdotes and builder experience show that poorly documented necks are more likely to need unexpected drilling, shimming, or professional intervention. It’s safer to pass on a tempting but under‑documented neck and wait for one with solid specs and orientation photos than to risk a project‑stopping mismatch.
Buying a Tele neck on DHgate: seller checks, payment, shipping, and refunds
- Check listing photos carefully: look for clear views of the headstock, heel, fingerboard, and truss rod access, and confirm that the tuner layout, logo orientation, and side dots match a left-handed neck if the listing claims it is left-handed.
- Verify written specs against your measurements: make sure the description lists scale length, heel length/width/thickness, mounting hole pattern, materials, and finish, then compare those numbers to your Tele body checklist; treat any gaps or contradictions between text and photos as questions to resolve before ordering.
- Assess seller reliability on DHgate: review ratings, how many transactions they’ve completed, and what buyers say in reviews about accuracy of descriptions, shipping, and communication. Pay attention to how the seller responds to buyer questions on the platform, especially about specs and orientation.
- Keep payment inside DHgate: use DHgate’s normal checkout and avoid any request to pay via external links, direct transfers, or “friends and family” methods. Before confirming, double‑check the order summary, total price, currency, and any stated taxes or fees so there are no surprises.
- Evaluate shipping and packaging promises: look for estimated delivery timeframes, tracking availability, and any mention of protective packaging (foam, bubble wrap, box support) that makes sense for a fragile guitar neck. If shipping details are extremely vague, ask for clarification or consider another seller.
- Understand DHgate’s dispute and refund framework in general terms: read current DHgate help or policy pages so you know how buyer protection works, what counts as a misdescribed or damaged item, and how long you have to open a dispute or request a refund if there’s a problem with the neck.
- Plan how you would handle problems: if the neck arrives misdescribed or damaged, document the issue with clear photos, contact the seller through DHgate’s messaging, and be prepared to escalate through the platform’s dispute system within the stated timelines if you can’t resolve it directly.
- Favor transparent, responsive sellers: I would only proceed with payment when heel dimensions, hole pattern, and left-handed orientation are clearly documented in specs and photos, and the seller has answered follow‑up questions helpfully. If key measurements or policies remain vague even after messaging, it’s better to back out and look for a more clearly documented listing.
From specs to purchase: a step-by-step decision workflow
- Identify your Tele-style body: note the brand, model, and any known specs, then write down your own comfort preferences for neck profile, fingerboard radius, fret size, and finish feel.
- Use your fit essentials and measurement checklist to determine the heel length, width, thickness, scale length, and mounting hole pattern that a replacement neck must match on your body.
- Shortlist neck options that appear compatible—prioritizing clearly Tele-spec, left-handed necks with documented measurements and construction details—and treat generic or Strat-based options as experimental choices that demand extra scrutiny.
- Compare each DHgate-style listing against your written fit and feel checklist, eliminating any option with unclear heel dimensions, pocket compatibility, screw spacing, or ambiguous left/right orientation in photos.
- Message sellers to confirm missing or ambiguous specs such as exact heel size, screw spacing, drilled vs undrilled holes, and left-handed nut orientation, and keep only listings where answers are specific and match the photos and description.
- Before placing an order, re-check seller ratings and reviews, shipping timeframes and packaging promises, and DHgate’s current dispute and refund basics; proceed with payment only once fit, orientation, and transaction terms all look clear and acceptable.
- Treat walking away as success when needed: if key measurements, photos, or policies stay vague or inconsistent even after messaging, skip that neck and choose a better-documented option rather than accepting avoidable risk.
FAQ: unusual left-handed Tele neck scenarios
Can I use a right-handed Telecaster neck on a left-handed build?
Many DIY builders do this successfully, but it’s a workaround with compromises. You’ll need a new nut cut for left-handed string order and a full setup, and the headstock logo, tuner layout, and side dots may look or feel “wrong” because they were designed for right-handed orientation. It’s a reasonable option if you’re comfortable with these cosmetic and feel quirks and have access to a good setup, but if you want a straightforward lefty build, a purpose-built left-handed Tele neck with clear specs is safer.
When is a Strat neck an acceptable substitute on a Tele body for a left-handed project?
Strat necks often share the same 25.5″ scale and similar heel width as Tele bodies, so they can work in practice, but success still depends on the exact heel shape and screw pattern. Small gaps at the pocket, slightly different overhang, or misaligned holes are common, and may require shims, re-drilling, or extra setup work. Treat a Strat-on-Tele combination as an informed experiment, not a guaranteed drop-in fit—best for builders who are willing to correct minor mismatch issues rather than someone expecting a plug-and-play part.
Should I choose a drilled or undrilled neck heel for my Tele-style body?
A pre-drilled Tele-spec heel is convenient if its hole pattern truly matches your body’s existing holes; you can bolt it on with minimal extra woodworking and focus on setup. An undrilled heel gives you more control: you or a tech can drill new holes to match your body exactly, which is useful if the existing pattern is non-standard or you’re mixing parts from different brands. However, drilling requires accurate measurement, clamping, and tool skill; if you’re not confident doing that yourself, plan to involve a professional rather than risk misaligned holes or a weakened heel.
What’s the safest choice overall for most left-handed Tele neck buyers?
For most left-handed players, the lowest-risk option is a clearly Tele-spec, left-handed neck with documented heel dimensions, mounting pattern, scale length, and close-up photos that match the description. Flipped right-handed necks, Strat-on-Tele builds, and custom drilling can all work, but they add layers of uncertainty and usually require extra setup or pro help. If you’re not chasing a highly experimental project, prioritizing a well-documented left-handed Tele neck and verifying its measurements against your body is the most straightforward path to a playable, reliable result.