
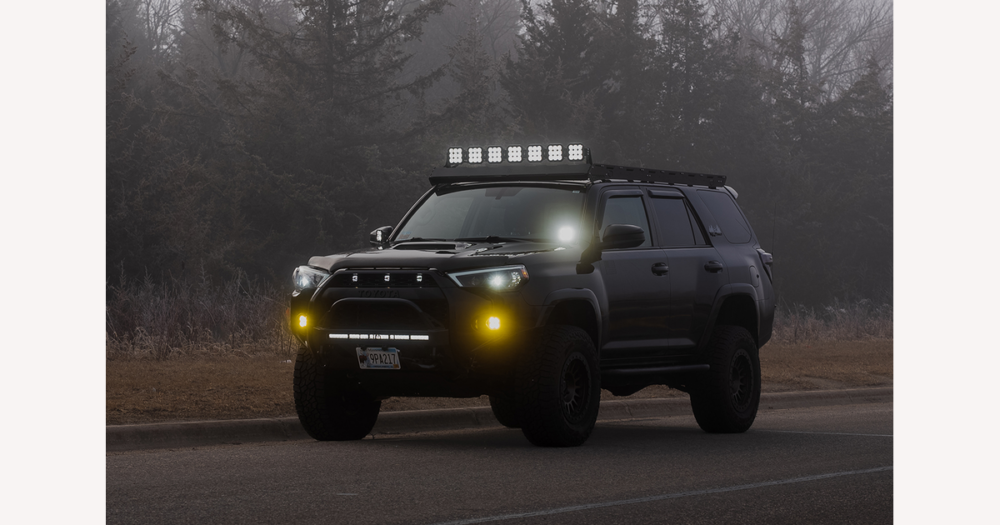
If you’re browsing DHgate for a roof rack LED light bar under $200, the safest way to get something durable is to treat familiar budget brands like Nilight and Auxbeam as candidates, then judge each bar by its housing, waterproof rating, mounting hardware, and the seller’s track record rather than by the logo alone.
How much weight should you give budget brand names like Nilight and Auxbeam?
Names like Nilight and Auxbeam show up a lot when you search for budget roof rack light bars because they hit a familiar value point: bright enough for most casual off-road or work use, housings that are usually solid for the price, and a cost that comfortably stays under $200. That repeated presence in search results, reviews, and forum threads is a useful signal that plenty of people are buying and broadly satisfied with at least some of their bars, but it does not mean every model from those brands is the most durable choice or automatically ideal for a roof rack in Canadian weather.
It helps to separate three different things. First, aggregate user impressions and popularity—how often a name comes up and what people say about it—give you a rough sense of value but are anecdotal. Second, the construction details on a specific listing—what the housing is made of, whether there is a stated IP rating, how the brackets attach to a rack, what voltage range is supported, and what warranty is offered—are hard facts you can check. Third, marketing lines like “super bright,” “military grade,” or “ultra-rugged” sit somewhere in between, and only become meaningful when they line up with clear specs and real-world feedback.
I would treat familiar budget brands as candidates worth investigating, not default winners. On DHgate or any marketplace, I’d open the listing and look for a clear description of the housing material, a specific waterproof and dustproof rating, photos that actually show the mounting hardware for a roof rack, and a written warranty or return policy before trusting the logo. If a lesser-known brand publishes similarly detailed specs, shows consistent positive reviews, and comes from a seller with a solid track record, I’d happily consider it alongside Nilight or Auxbeam; the brand name is a shortcut, not the decision itself.
Because of that, the safer way to buy is to treat popularity and recommendations as one piece of tentative evidence, then judge the individual bar on its build, compatibility with your rack and vehicle, and the reliability of the DHgate seller behind it. Pin down what “durable” should actually mean in spec terms—housing, waterproofing, brackets, and cooling—so you can scan any listing for those clues instead of relying on brand reputation alone.
What does “durable” really mean for a roof rack light bar under $200?
For a roof rack light bar under $200, “durable” really means the bar can live on the roof through rain, snow, and vibration without the housing corroding, the seals failing, or the LEDs cooking themselves. In practice, that comes down to four checkable areas: housing material, waterproof and dustproof rating, mounting hardware, and thermal management, all of which should be visible in the listing text or photos.
Start with the housing. I look for an aluminum body—often described as die-cast or extruded—with a powder-coated or anodized finish, because these finishes help resist corrosion and fading. Listings that lean heavily on shiny chromed steel or thin, unreinforced plastic housings are more likely to pit, crack, or buzz on a roof rack over time, especially in winter road salt. A good listing will actually name the material and finish instead of just saying “high-quality shell.”
Turn to the waterproof and dustproof rating. Many automotive light bars quote an IP code such as IP65 or IP67. In the IEC system, both are dust tight (the “6”), but the second digit distinguishes water protection: IP65 is rated against low-pressure water jets, while IP67 is tested for temporary immersion. On a roof rack, I’d expect at least a stated IP65 and prefer IP67, because it suggests better sealing against heavy rain and slush. If the listing only promises “fully waterproof” with no rating, I’d treat that as marketing rather than evidence.
Mounting hardware is another weak point on cheaper bars, so it’s worth studying the photos. Robust setups show thick brackets that clamp securely to the rack, stainless or coated fasteners, and multiple adjustment points so you can angle the beam without running the bolts to their limits. If you can’t clearly see how the brackets attach, or the kit looks like thin generic L-brackets with soft-looking hardware, assume it will be harder to keep tight under vibration and wind.
Finally, look for basic thermal management. LEDs generate heat, and if that heat isn’t pulled away from the board, output drops and lifespan suffers. On a listing, that usually shows up as visible cooling fins cut into the back of the housing, sometimes described as “heat sinks” or “oversized fins” in the copy. You don’t need lab data, but you do want to see a thoughtful design rather than a smooth, boxy shell with nowhere for heat to go.
At this price, you’re not buying a motorsport-grade bar with lifetime guarantees, but you can still demand clean, specific descriptions instead of vague durability slogans. I would rather push close to the $200 ceiling for a bar that clearly states its housing material, IP rating, hardware details, and cooling design than roll the dice on an ultra-cheap option that hides or omits those specs, especially for a roof-mounted install that’s hard to access once winter sets in.
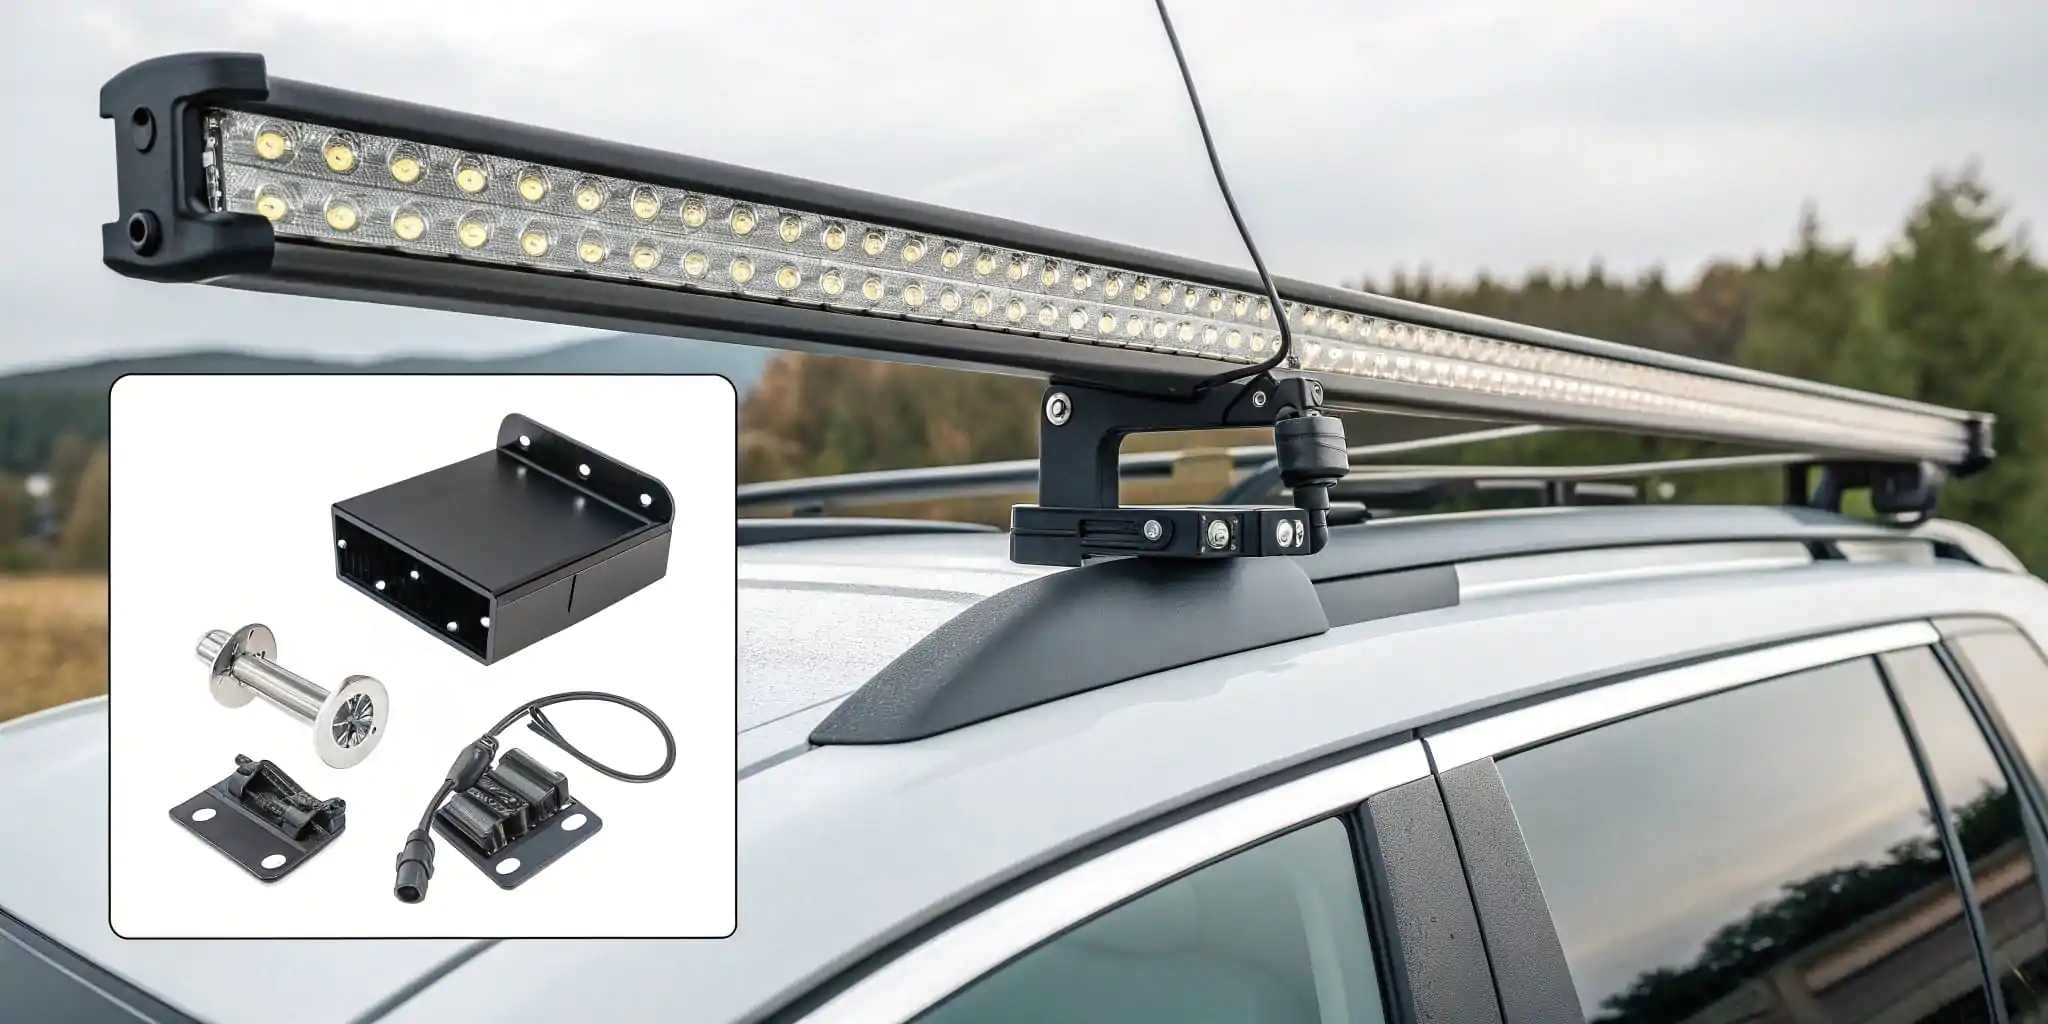
Look for metal housings with visible cooling fins and solid brackets that clamp cleanly to the rack, as shown here, rather than thin brackets or smooth, featureless housings.
How do budget light bar brands compare with premium options?
| Aspect | Budget brands under $200 | Premium brands |
|---|---|---|
| Typical price range | Usually well under $200 for most bar lengths, often clustering around the $60–$150 mark, which makes them attractive for casual use or first-time setups. | Frequently above $200 for comparable lengths, especially once you add curved housings, advanced optics, or branded wiring kits; they are a reference point for higher build and support expectations rather than a direct option at this budget. |
| Housing and bracket quality | Commonly use decent aluminum housings and workable brackets, but thickness, finish, and corrosion resistance can vary a lot between models; softer hardware and thinner brackets are more likely, so you have to inspect photos and descriptions closely. | Tend to use thicker cast or extruded housings, more consistent coatings, and heavier stainless hardware, with brackets that feel overbuilt for the load; there is usually less variation in basic construction from one model to the next. |
| Specification transparency | Listings may highlight headline stats like lumens and IP rating but leave gaps in details such as alloy type, coating, or exact mounting hardware; some models are clearly documented while others lean on generic “rugged” wording. | Specs are usually more complete and consistent: clear IP ratings, named materials, beam patterns, and wiring details, often with diagrams or testing notes, making it easier to verify whether the bar truly matches your needs. |
| LED and performance consistency | Output is often good enough for general off-road or work use, but LED binning, color consistency, and long-term performance can vary between batches or even between different bars under the same label. | More predictable performance from bar to bar, with tighter control over LED color, output, and optics; you’re paying partly for that repeatability as well as for testing that goes beyond basic marketing claims. |
| Warranty and support | Warranty language can be vague or limited, and support often runs through marketplace messaging; some sellers are responsive, others less so, so you need to read warranty statements and feedback for each listing instead of trusting the brand name alone. | Typically backed by clearer written warranties and more formal support channels, sometimes including regional service or easier returns; terms are usually spelled out in detail so you know what happens if the bar fails. |
| Practical choice under $200 | You’re effectively in the budget or midrange tier, so you accept some compromises but can still demand clear specs and honest warranty terms. I would rather choose a bar closer to $200 from a budget brand that publishes credible materials, IP rating, and warranty details than gamble on a rock-bottom option with vague construction claims. | If a premium bar happens to fall near your budget, it may offer more robust construction and support, but in many cases you’re using premium brands mainly as a benchmark for what better materials, documentation, and backing look like, then applying those expectations to budget listings. |
| Variation within brands | Even within familiar budget brands, quality can differ between product lines—one series may have solid housings and hardware while another cuts corners—so treat each model’s specs, photos, and warranty on their own merits. | Premium brands also segment their ranges, but baseline expectations for construction and documentation are higher; still, checking the exact model’s specs keeps you from assuming every product under a known badge is automatically top tier. |
DHgate-style buyer checklist for any roof rack light bar listing
- Check roof rack compatibility first. Match the bar’s mounting style (side, bottom, or clamp-on brackets) to your rack, compare bar length to rack width so it doesn’t overhang dangerously, and make sure there’s clearance for your hatch, sunroof, or roof accessories. Confirm the bar’s weight plus brackets fits within your rack’s stated load limit.
- Confirm the electrical match. Most roof rack light bars are designed for a 12V system, but the listing should say so explicitly. Check whether a wiring harness, switch, and relay are included, and that the expected connection method lines up with how you plan to power the bar; avoid listings that gloss over how the bar is meant to be wired.
- Verify physical dimensions and beam pattern. Compare the bar’s stated length, height, and depth with your available space on the rack, including any fairings or crossbars, and choose a beam pattern—spot, flood, or combo—that fits your driving conditions instead of defaulting to the biggest bar that fits your budget.
- Review durability-oriented specs. Look for named housing materials (such as powder-coated aluminum), a specific IP rating, clear mentions of bracket and fastener quality, and visible cooling fins or other heat-dissipation features that align with the durability criteria already described. I would not compromise on having at least a credible IP rating and a clearly metal housing for a roof-mounted bar.
- Assess seller reliability. Scan overall ratings, the number of completed orders for similar items, and recent buyer feedback, paying attention to comments about build quality, shipping, and after-sales responses. Compare listing photos with buyer-uploaded images to spot cloned or misleading listings, and move on if the seller history looks thin or inconsistent.
- Confirm order and payment protection. Before committing, read the return and refund terms, note expected shipping times, and check that the marketplace uses payment protection similar to escrow so funds are only released once you confirm delivery. This safety net is especially important when trying lesser-known brands or new sellers.
- Treat the checklist as brand-agnostic. Apply these steps whether the bar is from a familiar name like Nilight or Auxbeam or a completely unknown label. I’m strict about clear specs, real photos, and transparent seller behavior, but I’m comfortable letting readers flex on cosmetic details or minor accessories if they’re experimenting or only using the bar occasionally.
Common pitfalls when buying budget roof rack light bars
- Trusting a generic or white‑label bar with copy‑and‑paste marketing but no real specs. If a listing leans on phrases like “super bright” and “heavy‑duty” yet never names the housing material, IP rating, or what the brackets are made of, you have no way to judge durability. On DHgate, I treat that as a stop sign and move to a bar that clearly states metal housing, a specific IP code, and what hardware is included, just as in the checklist’s durability step.
- Chasing the highest advertised lumen number. Many budget listings throw out huge lumen figures without explaining beam pattern, LED type, or how the output was measured. A smaller bar with realistic specs and photos of the beam can outperform an “over 50,000 lm” claim that’s just marketing. Tie this back to your checklist by checking whether the bar’s beam description, photos, and power draw line up, instead of ranking options by claimed lumens alone.
- Ignoring mounting compatibility and weight on the roof rack. It’s easy to buy a bar that technically fits the budget but not your rack, leading to awkward DIY brackets, poor aim, or a bar that sticks out past the vehicle. Worse, adding a heavy bar on top of other gear can exceed the rack’s dynamic load rating. The checklist’s first steps—matching bracket type to your rack and checking rack load limits—are what prevent this; if a listing doesn’t show the bracket style or give basic dimensions and weight, I would skip it.
- Overlooking seller history and return terms on a marketplace like DHgate. A light bar might look good on paper, but if the seller has few completed orders, patchy feedback, or vague refund language, resolving a misrepresented or damaged order becomes much harder. The seller‑reliability and order‑protection steps in the checklist exist for this reason: scan recent reviews, compare listing photos to buyer images, and read the refund window. Thin or inconsistent seller data is a practical red flag.
- Treating a suspiciously cheap, underspecified listing as a harmless gamble. When a deal looks dramatically better than comparable bars yet lacks clear specs, IP rating, or consistent photos, the risk is not just wasting money—it’s mounting a failure‑prone bar on your roof in harsh weather. I would rather walk away from that kind of bargain and choose a slightly more expensive, well‑documented option that passes the checklist, especially for something exposed to wind, rain, and vibration at highway speeds.
How to treat reviews, forums, and certifications as evidence
User reviews are helpful for spotting patterns, not for delivering a verdict. When you scan feedback on DHgate or other platforms, look for recurring issues like water ingress, bracket failures, or flickering LEDs that show up across multiple comments over time. At the same time, remember that many reviews are written in the first few days, can be influenced by freebies or discounts, and may even be manipulated, so a handful of glowing five‑star posts is weaker evidence than a long trail of consistent, detailed reports.
Forum threads and community discussions add a different kind of signal. Enthusiast forums, off‑road groups, or vehicle‑specific communities can reveal which specific models keep getting praised or criticized for real‑world use, wiring, or fitment. Those posts usually reflect particular vehicles, climates, and driving habits, though, and they rarely cover every bar sold under a brand name, so they should guide your short list rather than stand in for checking the exact model you plan to buy.
Basic certifications and ratings, especially IP codes, are one of the few structured pieces of evidence you can rely on—but only for what they actually measure. An IP67 or IP68 rating, when credible, tells you the bar was tested against dust and water to defined conditions; it does not guarantee long‑term seal quality, screw strength, or overall warranty support. Treat IP and similar ratings as a necessary checkbox for a roof‑mounted bar, then go back to the listing to confirm the housing material, bracket design, and cooling features match the durability picture you expect.
It helps to separate evidence types in your mind. User reports, independent tests if any are mentioned, and manufacturer claims all carry different weight; a seller’s marketing paragraph does not equal a third‑party review, and one strongly positive user story does not erase multiple reports of failure. I prefer to use reviews and forums to flag potential problems and to prioritize models with steady, believable praise, then verify that the DHgate listing’s specs, photos, and seller history align with those reports. For mixed‑quality brands in particular, a well‑reviewed series is encouraging, but it does not automatically validate every bar under the same label, so each model still has to earn its place through its own specs and evidence.
Qualities that make a brand a strong candidate under $200
Across budget and midrange options under $200, the strongest brands all behave in similar ways. Their listings describe housing materials and IP ratings clearly and consistently across different models, they show realistic, detailed photos of the actual bar and mounting hardware, and their spec sheets are specific enough that you can match length, beam pattern, voltage, and bracket style to your roof rack and vehicle. When you check reviews or forum threads, the stories people tell about those bars usually line up with what the specs promise rather than contradicting them.
Support and warranty signals matter just as much as the headline specs. A brand that states a straightforward warranty, responds to buyer questions, and has a track record of resolving issues is effectively telling you it’s willing to stand behind its roof rack light bars even at budget prices. That kind of transparency is a stronger durability signal than any “heavy‑duty” slogan in the description.
Patterns like these can show up in familiar budget names such as Nilight and Auxbeam, but also in lesser‑known labels on DHgate and other marketplaces. The name itself is less important than the behavior: repeated, credible descriptions of construction and IP ratings, photos that look like the real product rather than generic stock imagery, and specs plus user reports that tell the same story. I would rather choose a brand that ticks those boxes and sits near the top of the under‑$200 range than chase the absolute lowest price from a seller with sparse information and vague promises.
When you’re scrolling through pages of search results or marketplace listings, use these traits to build a mental shortlist. Give your attention to brands whose bars show clear materials and IP codes, consistent photos across models, and visible support or warranty details. Deprioritize listings that lean on buzzwords, hide or skip key specs, reuse identical images for multiple products, or make it hard to see how problems would be handled. That simple filter keeps your focus on brands that behave like they want their roof rack light bars to last.
FAQ: roof rack limits, bar length, and stretching the budget
Should I prioritize bar length or brand and build quality for a roof rack light bar under $200?
Beam coverage and proper fit to your rack and vehicle matter, but I would still prioritize a well‑built bar with solid mounting and credible specs over chasing the longest possible length. A slightly shorter bar that mounts securely, matches your rack, and passes the durability checks outlined earlier is a safer choice than a flimsy full‑width bar, especially in harsh climates with snow, road salt, and strong winds.
How much extra weight can my roof rack safely handle with a light bar installed?
Every vehicle and rack system has manufacturer‑rated load limits, and those limits must cover the combined weight of the light bar, its mounting hardware, and any other cargo on the rack. Because ratings differ widely, this guide can’t give universal numbers—check your vehicle manual and rack manufacturer’s specs for both static and dynamic load limits, and keep the total below the lowest stated rating to avoid safety and warranty issues.
Is it ever worth spending more than $200 on a roof rack light bar?
If you expect frequent off‑road use, long hours of night driving, exposure to extreme weather, or you’re relying on the bar in situations where failure would be costly, it can be sensible to step slightly above $200 for better‑documented construction, clearer testing, and stronger support. That aligns with my preference for build certainty over minimum price: once you’ve applied the durability and seller checks from earlier, paying a bit more for a bar with stronger evidence and backing can be a worthwhile trade‑off.
How should rack- and vehicle-specific limits influence my final choice?
Use the earlier durability and compatibility checks as a framework, then layer on your rack and vehicle data. Confirm the rack’s load rating, the vehicle’s roof limits, and any fit notes in the manuals, and only consider bars whose length, weight, and bracket style sit comfortably within those boundaries. Where there’s a conflict between a promising light bar and a manufacturer limit, the limit wins—no general guide can safely override those rack‑ and vehicle‑specific constraints.