
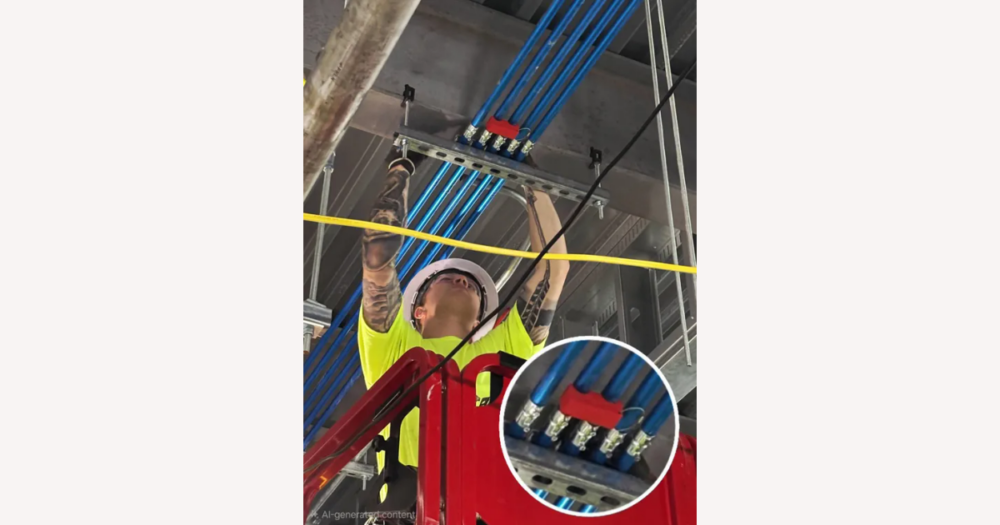
Conduit spacing tools are specialized aids that lock in even, repeatable gaps between conduits and panel or box entries, so you’re not re-measuring every run with a tape and hoping your eye is still true. On DHgate, they usually appear as magnetic spacers, clip-on or snap-in saddles, and panel layout jigs; the right choice comes down to whether their stated sizes, spacing and materials genuinely match your EMT or rigid conduit and the way you work, and whether the seller’s listing and history look trustworthy enough that you’d rather buy the tool than keep relying on a homemade block and a tape measure.
What conduit spacing tools are and how they differ from basic measuring
Conduit spacing tools are purpose-made layout aids that keep multiple conduits or box entries evenly spaced and aligned, so every run looks deliberate and fits within your layout marks. Instead of re-measuring each gap, you use a spacer or jig as a physical reference that repeats the same distance every time. When you’re browsing DHgate, these tools show up as conduit spacers, spacing saddles, or panel layout jigs rather than general measuring tools.
Magnetic spacers are small blocks or bars that stick to steel conduit or panels. They’re usually sized around specific conduit outer diameters, so they “nest” against EMT or rigid and hold two or more runs at a fixed gap while you strap or clamp them. Clip-on or snap-in saddles are physical brackets that grab the conduit itself—often two or three at a time—so the spacing is set by the shape of the saddle rather than by a magnet. Panel layout jigs, by contrast, sit on the edge or face of a panel or box and give you reference notches or holes to mark repeated conduit entry positions before you start drilling or punching.
You can do all of this with a tape measure, ruler, or a rough homemade block, but manual methods are slower and easier to misread when you’re repeating the same spacing many times. A well-sized spacer or jig gives you hands-free alignment and more repeatable gaps, especially when you’re juggling ladders, levels, and fasteners. On DHgate, the trade-off is that you can’t handle the tool in person, so later sections focus on the specs and materials you can read in listings to decide whether a spacer really matches your conduit sizes and is worth trusting over a simple measure-and-mark approach.
Key specifications that make a conduit spacing tool actually fit your work
- Conduit size compatibility: Check which conduit sizes and standards the tool claims to fit, and match that to the outer diameter of your usual EMT, rigid, or metric conduit. A spacer that’s loose on one size or too tight on another won’t hold alignment reliably.
- Spacing distance or increments: Look for the fixed gap the tool sets between conduits, or any adjustable increments if it’s a multi-position spacer. Compare those numbers to the spacing you actually want between parallel runs or box entries, rather than assuming the default is correct.
- Overall length and footprint: Note the length of the bar or jig and how far it projects from the conduits or panel. Long tools can be more stable on open walls but may clash with nearby breakers, knockouts, or other services inside a tight panel or cabinet.
- Magnet strength or clamp design: For magnetic tools, check how many magnets are used and how they’re described; for clip-on saddles, look at how the jaws or clips grab the conduit. You want enough holding power to stay put on clean steel in typical positions, without assuming it will grip through thick paint, rust, or heavy dust.
- Thickness and reinforcement: Pay attention to wall thickness, ribs, and fastener size where you can see them in photos or diagrams. Thicker sections, bracing ribs, and substantial screws or rivets usually signal a tool that’s less likely to twist, crack, or go out of square after jobsite abuse.
When you scan DHgate listings, start by looking for explicit size ranges, conduit standards, and dimension drawings. Listings that show a simple table of supported conduit trade sizes, a sketch with key dimensions, or photos with a ruler in frame make it much easier to compare the tool to the EMT or rigid sizes you actually use.
Treat vague or incomplete dimensions as a caution flag. If a listing only says “fits most conduits” or shows photos with no clear scale, it’s safer to skip it and look for a spacer with believable, specific compatibility details. I’d rather stick with a taped block of scrap wood or a simple measure-and-mark workflow than gamble on a tool whose dimensions I can’t verify from the description and photos.
Remember that no DHgate listing can guarantee code-compliant spacing on its own. You still need to know the required distances for your project and check whether the tool’s fixed spacing matches or can be combined with your marks to meet those requirements. If the numbers don’t line up clearly, treat the spacer as a generic layout aid and rely on your own measurements instead of assuming it will automatically deliver code-correct spacing.
Magnetic spacers vs clip-on saddles vs layout jigs
| Tool style | How it holds spacing | Typical strengths | Common limitations | Best fit jobs |
|---|---|---|---|---|
| Magnetic spacer | Magnets clamp to steel conduit or panels, setting a fixed gap between adjacent runs or to a reference edge. | Hands-free alignment on EMT or rigid steel, quick to reposition, good for repeating the same spacing along a run. | Needs clean, reasonably flat steel; weak or small magnets can slide, and it won’t work on non-magnetic conduit or thick coatings. Magnet faces can chip if unprotected. | Parallel steel conduit runs on racks or walls, aligning conduits entering panels, quick layout checks where you can temporarily stick a spacer in place. |
| Clip-on or snap-in saddle | Mechanical jaws, clips, or saddles grip the conduit body and physically lock in a set distance between two or more pipes or from a box face. | Very fixed spacing once clipped on, not dependent on magnet strength; works on non-magnetic conduit and can enforce stand-off from boxes or walls. | Must closely match conduit diameter to grip; can be fiddly to attach and move, especially in tight panels; thin plastic versions may spread or crack over time. | Permanent or semi-permanent parallel runs on walls or strut, stand-off spacing from boxes or enclosures, jobs where you want the spacer to stay put while strapping or clamping conduit. |
| Panel layout jig | Uses a bar, plate, or template with pre-set hole or mark positions to transfer consistent spacing to panel tops, faces, or box layouts. | Speeds repetitive marking; keeps knockouts, entries, or box positions in a neat, repeatable pattern without measuring every gap. | Usually only for layout, not for holding conduit during installation; may be sized for a specific panel style; large jigs can be awkward in cramped spaces. | Marking conduit entry locations on panel tops or gutters, laying out rows of boxes or knockouts, shop or pre-fab work where you repeat the same panel pattern often. |
Materials and build quality: what signals a rugged spacing tool
Material choice is one of the clearest clues to how rugged a conduit spacing tool will feel in daily use. Steel bodies or clips tend to be strong and wear-resistant, and they hold their shape well if you drop them or over-tighten a strap. The trade-off is weight and corrosion: bare or thinly painted steel can rust if it lives in a damp van or jobsite, so on a DHgate listing I look for powder-coated or plated finishes rather than plain bright steel where possible.
Aluminum spacers and jigs are noticeably lighter, which can be an advantage when you’re working overhead or carrying several tools, and aluminum generally resists rust better than carbon steel. At the same time, thin or poorly supported aluminum can dent or deform if you crank it against a conduit or knock it around in a toolbox. Photos that show thicker sections, gussets, or ribs along the length make me more confident that an aluminum tool will stay straight.
Engineered plastics cover a wide range—from tough, glass-filled materials to brittle, glossy plastics that crack when flexed. Plastic clip-on saddles or spacer blocks can be perfectly serviceable for light-duty or occasional use, especially if they’re chunky and reinforced rather than thin and hollow. When I’m judging a plastic tool on DHgate, I zoom in on wall thickness, corner radii, and any cross-ribs; sharp, thin edges and long, unsupported spans are more likely to snap if you twist them on a tight conduit.
For magnetic spacers, magnet details matter as much as the body material. Larger magnets, multiple magnet segments, and believable pull-force descriptions suggest a more secure grip, especially on vertical or overhead runs. Protective coatings or cups over the magnets help prevent chipping and reduce rust on the magnet faces. In listing photos, I look for magnets that sit flush and well-seated rather than small dots glued onto paint, which can pop off under repeated use.
Visible fasteners and reinforcement also tell a story about build quality. Screws, rivets, and bolts that look proportionate to the tool’s size, backed by metal brackets or ribs, usually indicate a design meant to handle repeated clipping and unclipping. By contrast, a long spacer bar stamped from very thin sheet metal with no bracing is more likely to twist out of square. Close-up DHgate photos that show substantial fasteners, folded edges, or pressed ribs are more reassuring than distant glamour shots.
Marketing phrases like “heavy duty” or “professional grade” on their own don’t prove much. Without clear material descriptions, thickness indicators, or close-up images, it’s safer to assume durability is uncertain and treat the tool accordingly. In that situation I’d rather choose a simpler, clearly built spacer—one solid bar or a few robust clips—than a complex mechanism with hinges or sliding parts that could be weak points. When the listing makes it easy to see steel, aluminum, or well-reinforced plastic and gives believable detail, the durability claims carry more weight; otherwise, I treat them as sales language, not a guarantee.
Matching tool types to common conduit spacing jobs
- Panel or switchboard entries: For rows of conduits entering a panel or switchboard, panel layout jigs or simple marking templates help you repeat the same entry spacing along the gutter or top edge. Once the marks are in, you still rely on basic measuring tools to confirm they match your layout or any required clearances.
- Long parallel surface runs: On walls, racks, or cable trays where several EMT or rigid conduits run side by side, magnetic spacers or clip-on saddles that match your conduit diameter and target gap keep runs visually parallel and evenly spaced while you strap or clamp them.
- Stand-off from boxes and walls: When you need a consistent stand-off distance from 4×4 boxes, panels, or walls, box-specific caps or spacer blocks sized around common box dimensions can set the conduit or nipple at a repeatable offset before you tighten fittings.
- Mixed or awkward layouts: For odd offsets, one-off retrofits, or tight corners where commercial spacers don’t match well, many electricians fall back on a tape measure, square, and a homemade jig cut from scrap material, accepting that setup takes a bit longer in exchange for a custom fit.
- Professional vs occasional use: If you’re spacing conduits day in and day out, it’s worth choosing a more robust, clearly specified spacer or jig that matches your usual conduit sizes and spacing pattern. For light DIY or occasional jobs, a simpler, lower-cost tool—backed up by careful measuring and DHgate’s buyer protections—can be enough as long as you recognize its limits.
How a conduit spacing tool fits into your layout workflow
- Confirm that the tool’s stated conduit sizes and spacing distance match your job plan or required clearances before you unpack it on site.
- Measure and mark your first reference position on the panel, box, or wall with a tape measure or ruler so the initial point is accurate.
- Attach or position the spacer—whether magnetic, clip-on, or a layout jig—on the first conduit or reference edge in the orientation the design expects.
- Use the spacer to set each subsequent conduit or mark, fixing straps or making layout marks one position at a time so the spacing repeats consistently.
- Every few runs, double-check spacing and alignment with a tape measure or level to catch any drift or cumulative error instead of assuming the spacer is perfect.
- Once conduits are secured and you’ve rechecked that spacing and alignment meet your layout requirements, remove the tool and stow it so it’s ready for the next run.
Common pitfalls and limits when choosing and using spacers
- Check actual conduit outer diameters before reusing a spacer on a different system. A spacer labelled for 3/4″ EMT will not necessarily fit 3/4″ rigid or a metric size, and a loose or overly tight fit can twist conduits out of line instead of holding them straight.
- Be cautious with magnetic spacers on anything except clean, bare steel. Dust, paint, mill scale, or galvanized coatings can reduce grip, and magnets won’t hold at all on aluminum, stainless, or plastic surfaces even if the listing promises “strong magnetic” performance.
- Treat any fixed spacing as a convenience, not automatic code compliance. Verify with your own tape measure or layout that the spacer’s gap matches the clearances your project, standards, or local code expect instead of assuming the factory setting is acceptable everywhere.
- Assume marketing promises are optimistic. Claims of “perfect alignment” or “install in seconds” are advertising, not a guarantee; keep checking with a tape measure, level, or square so you catch drift, flex, or manufacturing tolerances the spacer doesn’t reveal.
- If a DHgate listing’s specs, materials, or photos look vague, inconsistent, or flimsy, skip it. I would rather rely on a tape measure and a simple homemade jig than trust a spacer whose dimensions and build quality I can’t clearly understand from the evidence provided.
Reading quality signals for spacing tools on DHgate
Most DHgate listings for conduit spacing tools give you a mix of text and images, and the trick is to separate concrete detail from loose marketing. Material descriptions, size tables, and dimension diagrams are your starting point: specific mentions of steel, aluminum, or reinforced plastic, together with outer diameter ranges and spacing distances in millimetres or inches, tell you far more than generic phrases like “high quality” or “professional grade.” Clear diagrams or photos with rulers or calipers help you check whether the stated sizes make sense for your usual EMT or rigid runs.
Close-up photos of magnets, clips, and fasteners are another key signal. You’re looking for details such as magnet blocks that are fully seated and coated, clip arms that look thick enough not to snap, and screws or rivets that appear properly seated rather than crooked or mismatched. When those close-ups line up with the written dimensions, I find it easier to believe the tool will hold its shape on site.
User reviews and ratings can fill in what photos can’t, especially around feel and fit. Several reviews that mention how tightly the spacer grips specific conduit sizes, how it behaves when bumped, or how the magnets hold on painted steel are more useful than a single short comment that just says “good” or “fast shipping.” Outliers—one glowing review or one angry complaint—should be treated cautiously; patterns across multiple buyers matter more than any one story.
Brand names, logos, or vague certification badges can look reassuring but should be treated as marketing hints, not proof. Unless you can understand and independently verify a claimed standard, it’s safer to assume the badge only signals intent to look professional. For relatively niche tools like conduit spacers, you often won’t get lab-grade documentation, so I lean heavily on consistent dimensions, believable photos, and practical reviews instead.
In practice, I prefer DHgate listings where the materials, dimensions, and images all tell the same story and at least a few reviews comment on build and fit. When evidence is thin, contradictory, or obviously copied from another product, I’d rather pick a simpler, low-risk tool or stick with a tape measure and a basic homemade jig than gamble on an unconvincing spacer.
DHgate-specific checks before you order a spacing tool
- Check the DHgate seller’s rating, number of transactions, and how long they’ve been active. Prefer sellers with consistently high scores and detailed feedback that mentions tools or hardware, and be cautious if reviews are sparse or recently negative.
- Compare the listing’s stated conduit sizes, spacing distances, and material descriptions directly to your own requirements. If EMT/rigid sizes, metric/imperial units, or spacing increments are vague, missing, or inconsistent, treat that as a reason to skip the listing for a precision tool.
- Study the product photos for clear dimensions and build details: look for rulers or size diagrams, close-ups of magnets, clips, and fasteners, and images that match the written specs. Avoid listings that reuse generic images or hide critical areas like the contact surfaces.
- Use DHgate-supported payment methods that keep your transaction on-platform and covered by their buyer protection, and avoid off-platform payments or direct transfers that won’t be included in DHgate’s safeguards.
- Review the available shipping options, estimated delivery windows, and any notes about customs or remote-area restrictions. If shipping times are unclear or costs jump sharply at checkout, factor that into whether the tool is worth ordering at all.
- Before you buy, skim DHgate’s general buyer protection, dispute, and refund information so you know how to open a dispute and what evidence (photos, measurements, messages) you may need if the spacing tool arrives damaged or noticeably different from the listing.
FAQ: compatibility, mixed sizes, and DIY alternatives
Can one spacer set reliably cover both EMT and rigid conduit?
Sometimes, but only when the spacer’s actual gripping or nesting dimensions match the outer diameters of both conduit types. EMT and rigid of the same nominal trade size often have different ODs, so a spacer labeled “3/4 in” might fit one well and be loose or overly tight on the other. On DHgate, treat dual‑use claims cautiously: check any dimension tables or diagrams against the published EMT and rigid diameters you use, and if the listing is vague, ask the seller for exact OD ranges before assuming the tool will work on both.
How should I handle mixed metric and imperial conduit sizes when choosing spacers?
Ignore the trade-size labels at first and focus on the real dimensions. Metric and imperial systems rarely align neatly, so a spacer designed around a 20 mm OD won’t necessarily fit 3/4 in EMT, even if the numbers look close. When you’re shopping on DHgate, compare the spacer’s stated inner profile, slot width, or supported OD range to the manufacturer’s OD data for your conduit, using millimetres for both where possible. If the listing only mentions nominal sizes without clear OD values, treat that as a red flag and either clarify with the seller or choose a better‑specified tool.
When is it reasonable to build a simple DIY spacer jig instead of buying a specialized tool?
A DIY jig made from scrap wood, metal, or plastic can be perfectly sensible for occasional work, unusual spacing patterns, or one‑off retrofits where commercial tools don’t match your layout. It lets you cut a custom gap that fits your exact conduit and stand‑off distance, at the cost of some extra setup time. The trade‑off is durability and refinement: homemade jigs usually wear faster, may not grip as securely, and can be less precise than a well‑made spacer. For light‑duty or low‑stakes jobs, that’s often acceptable; for frequent professional use, those limits become more frustrating.
For frequent professional work, should I prioritize a clearly specified commercial spacer over DIY solutions?
If you space conduits regularly, a straightforward commercial spacer or jig with honest, detailed specs is usually the better primary tool. Clear OD ranges, spacing distances, material descriptions, and believable photos on DHgate make it easier to trust that the spacer will repeat the same gap all day without falling apart. I’d still keep DIY jigs as a backup for odd situations or when listings are too vague, but for daily panel layouts or long parallel runs, a rugged, well‑documented spacer is worth choosing so you’re not constantly rechecking or rebuilding homemade blocks to compensate for unclear dimensions.