
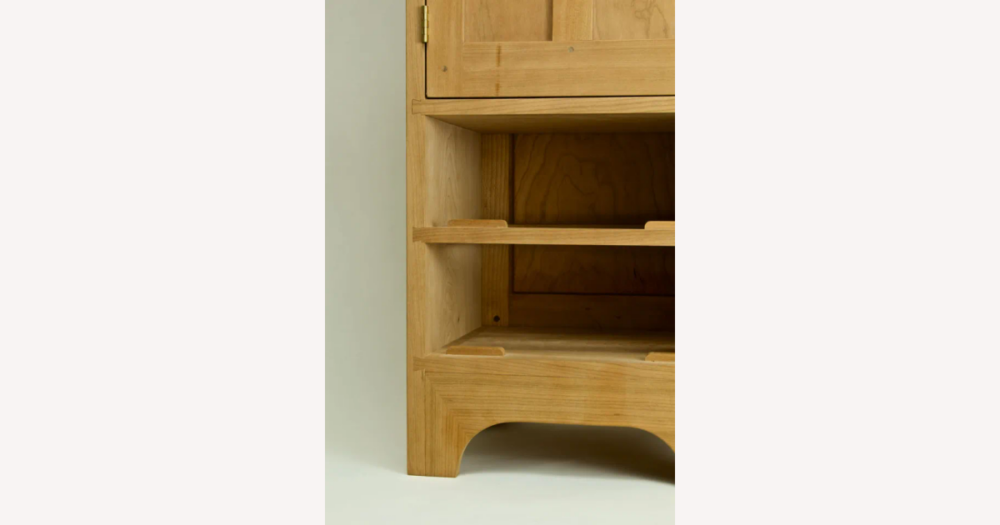
If you’re choosing drawer stops for an antique dresser or chest on DHgate, start by matching the hardware style to how your drawer actually rides in the case. Compact metal hammer-in stops can work well on sound, hidden rails; small wooden blocks are better when you want reversible, low-impact contact points; and sometimes the cabinet’s own rails or back pieces already provide natural stop surfaces that only need minor adjustment. Once you know which category fits your drawer construction and how much you want to protect original wood from new holes, you can use DHgate listing details and seller reputation to narrow hardware options with more confidence.
Main types of drawer stops that work for antique furniture
On DHgate, most drawer stops suitable for antique dressers and chests fall into three broad categories: compact metal hammer-in stops, simple wooden blocks, and stop points built from the cabinet’s own rails or back pieces. None is universally “best”; the right choice depends on how your drawer rides in the case and how careful you want to be with the original wood.
Metal hammer-in stops usually have one or two prongs that drive into a wooden rail or drawer side, with a small head that catches the back of the drawer front. Single-point versions are common where you just need a modest travel limit on a narrow rail; two-point “flat steel” styles spread the load and feel a bit more stable on wider rails. I would use these when the supporting wood is sound, reasonably thick, and hidden inside the carcass so the prongs and heads won’t show from the front.
Wooden stops are often nothing more than small blocks glued or screwed behind the drawer front or onto a rail where the drawer edge can strike them. They’re easy to shape and move, and they keep everything wood-on-wood, which suits many antiques visually. I tend to prefer this kind of block when I want a reversible solution and I’m nervous about driving metal into brittle rails or into areas that are visible when the drawer is open.
Some pieces already have natural back or rail stops built into the web frame between drawers or in a back rail inside the cabinet. In those cases, the safest option is often to adjust or supplement what’s there—adding a discreet wooden pad, for example—rather than introducing new hardware. If you’re building new furniture in an antique style, you can design rails and modern adjustable stops together from the start; for a true antique on DHgate, it’s wiser to let the existing structure lead and then choose the stop type that fits it with the least impact.
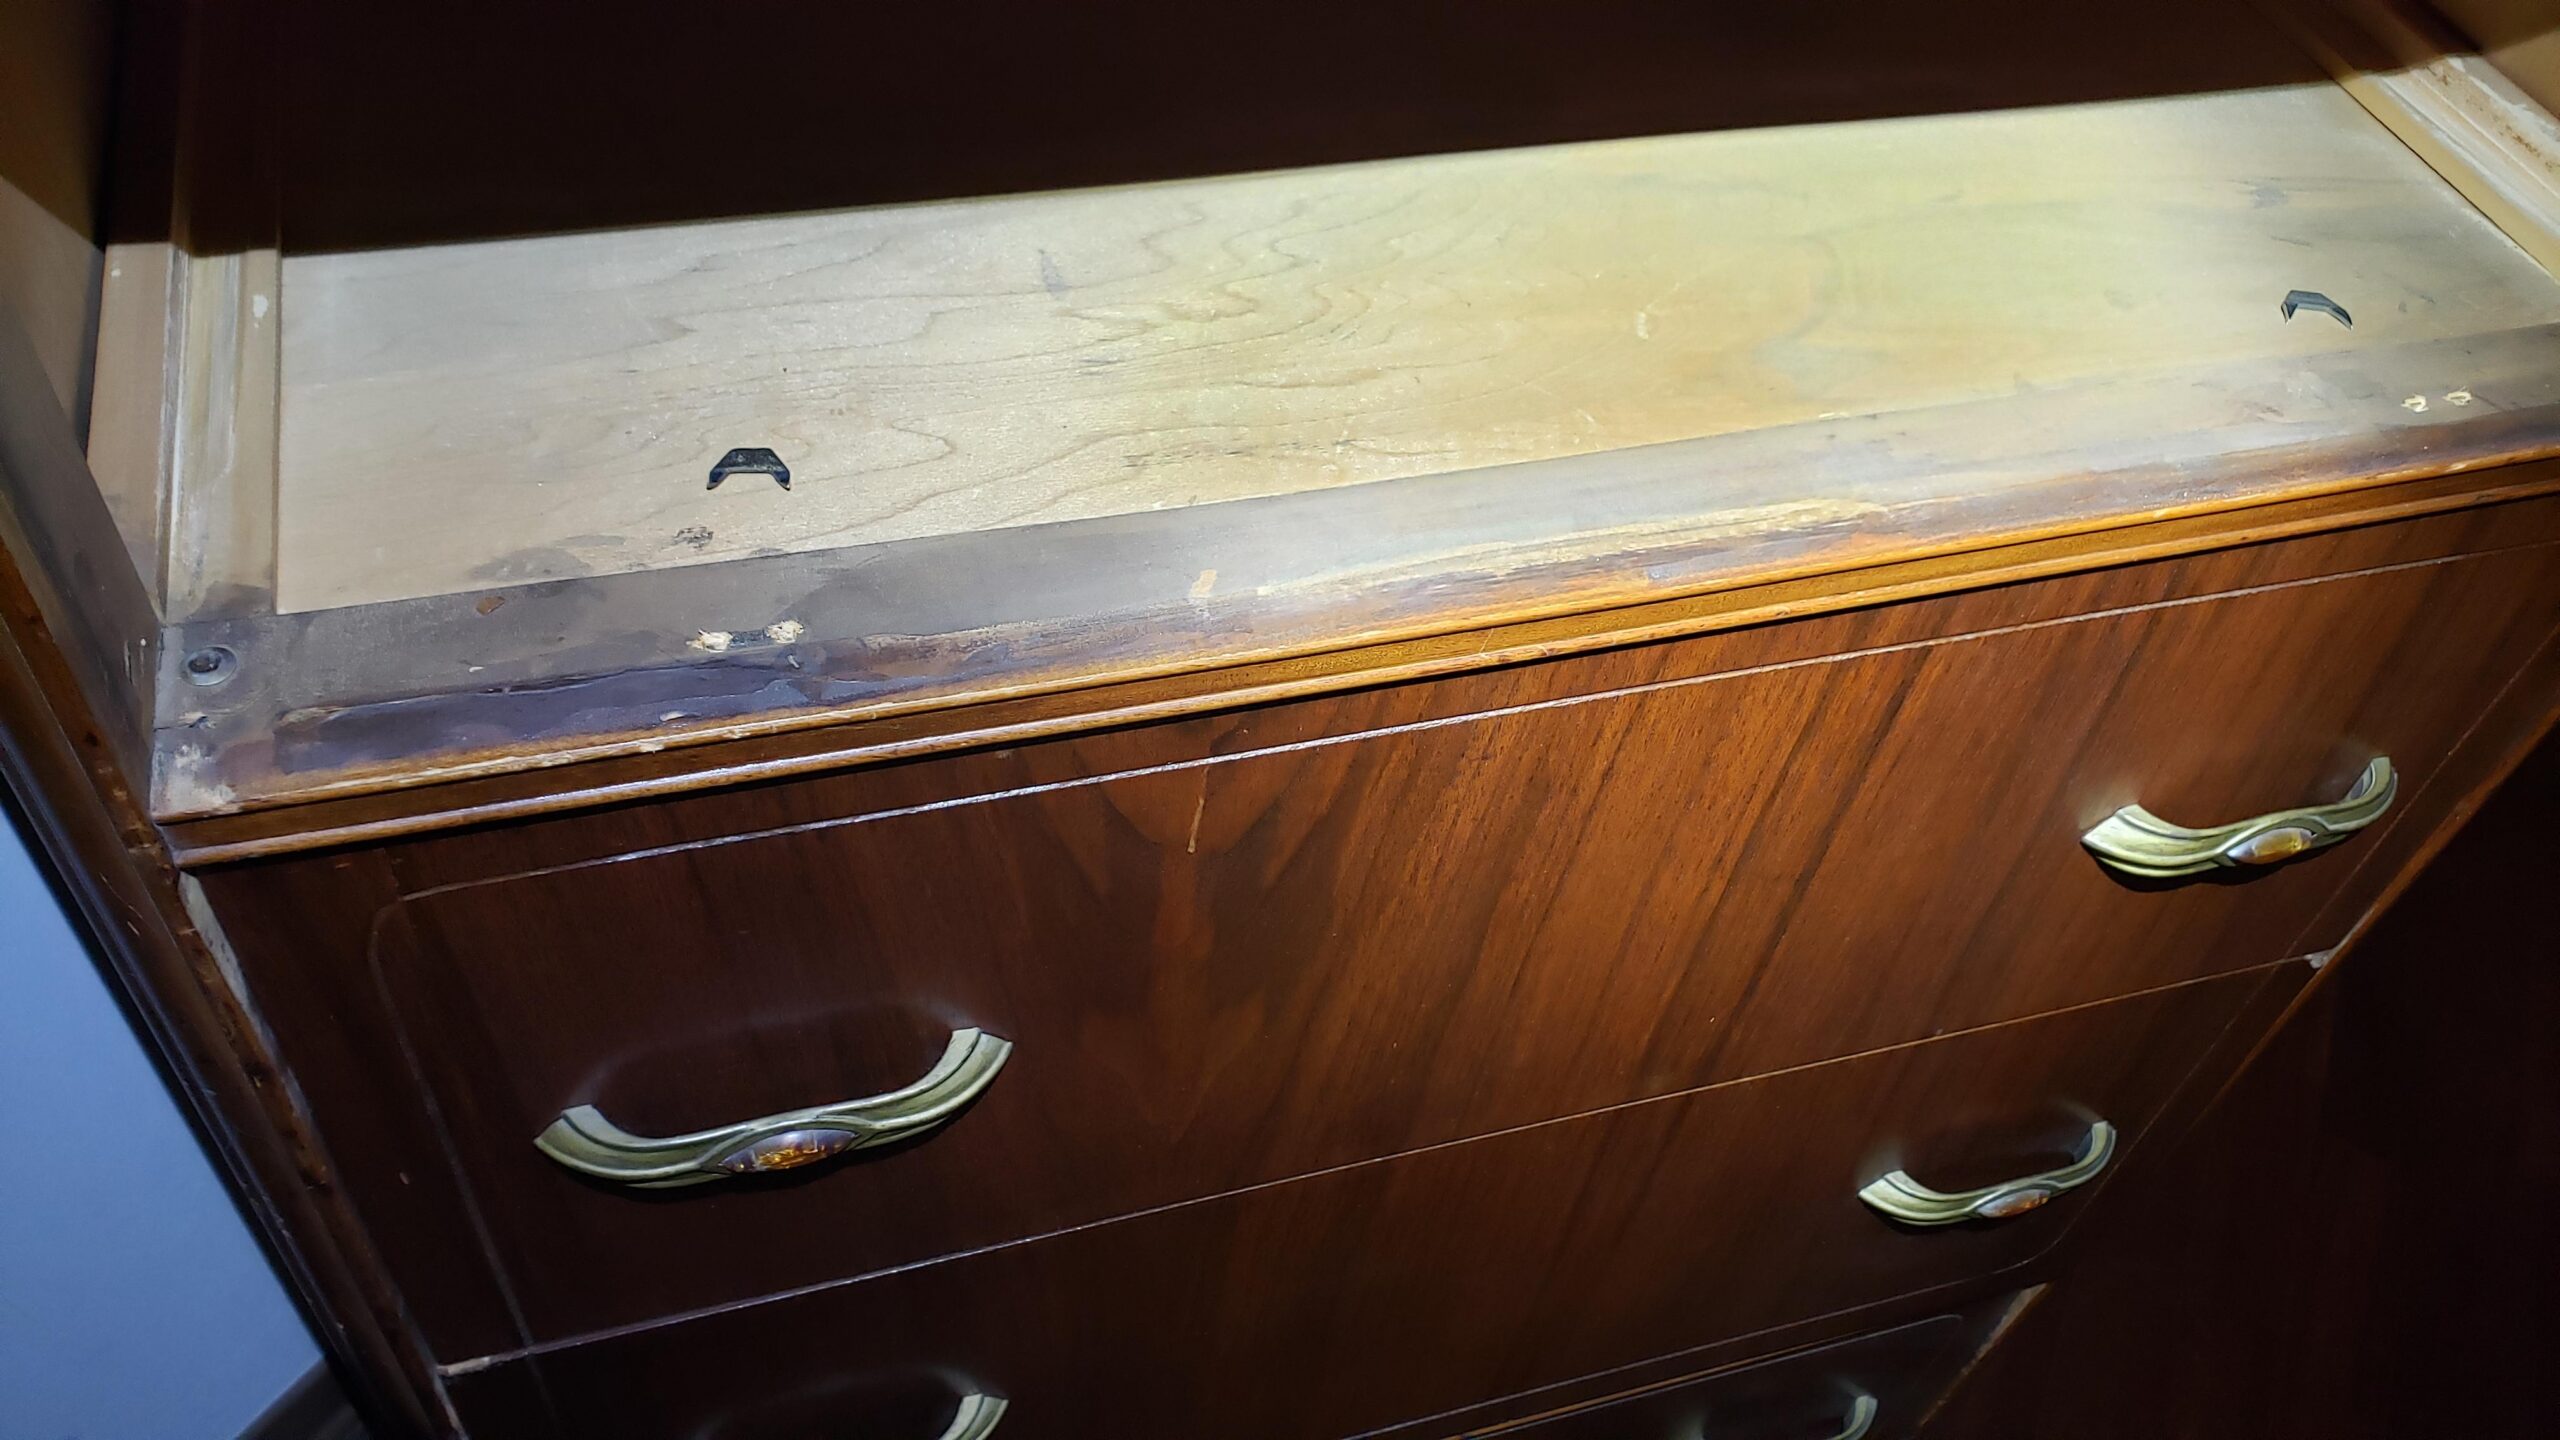
Close-up of metal drawer stops mounted on the inside rail of an old wooden chest of drawers, showing small flat steel pieces that act as travel limits for the drawer.
How antique drawer construction shapes your stop choice
Antique drawers are usually supported in a few recurring ways, and each pattern creates different places where a stop can safely bear. Side-hung drawers ride on rails along the case sides; bottom-hung drawers slide on runners under the drawer; many dressers have web frames—horizontal rails between drawers that the drawer edges pass under—and some pieces add kickers or back rails that prevent the drawer from tipping or sliding too far.
On a side-hung drawer, the side rails and the drawer sides themselves are typical mounting points. Metal hammer-in prongs need solid, reasonably thick wood here so the prongs can bite without splitting the rail; you’d position the stop where its head can catch the back of the drawer front as it closes. Wooden blocks can be glued or screwed to the rail or the inside of the case, giving the drawer front a flat surface to strike. With bottom-hung drawers, the runners and any back rail are more useful: a low block on a runner or a pad on a back piece can limit travel without touching decorative fronts.
Web frames between drawers often act as natural stops—the top edge of the rail between two drawer openings can already control how far a drawer enters the case. Where that rail is slightly low or uneven, a small wooden pad can turn it into a more positive stop; hammer-in metal is only sensible here if the rail is thick and hidden. Kickers or back rails, usually above or behind the drawer, can also carry stops, especially when you want to avoid adding hardware where it will be seen when the drawer is open.
Because antique furniture varies, you won’t always see textbook rails and runners. As you inspect your piece, look for sound, hidden wood where a stop can make consistent contact: enough thickness for prongs or screws, and flat surfaces that the drawer front or side naturally touches at full close. I’d rather adapt the stop type to whatever structure already exists than reshape an old carcass just to fit a particular hardware pattern. If you’re building new furniture in an antique style, you can reverse that logic and design your rails and modern adjustable stops together from the start.
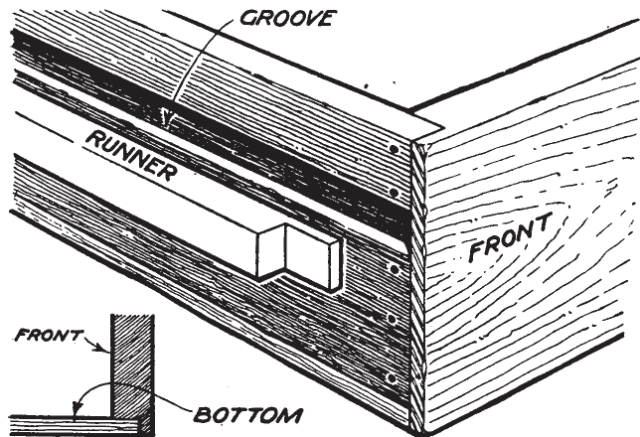
Diagram showing traditional drawer construction with side rails, bottom runners, web frames between drawers, and a back rail, illustrating where stops can be placed.
Metal vs. wooden drawer stops on antiques: key tradeoffs
| Stop type | Material and feel | Typical visibility | Reversibility and adjustment | Risk to antique wood | Typical starting use case |
|---|---|---|---|---|---|
| Metal hammer-in prong stops (single or double-point) | Steel or alloy with a crisp, mechanical feel; often marketed as “antique style” but still modern stamped or cast hardware. | Usually almost invisible with the drawer closed; with the drawer open, you may see a small metal tab on a rail or side if you look closely. | Adjustable by moving or bending slightly, but changing position means pulling prongs and driving them back in; removal leaves small holes in rails or sides. | Prongs concentrate force in a small area, so brittle or thin rails can split if you over‑drive them or choose prongs that are too long; safer on thick, sound, hidden wood. | Best when you have solid, unseen rails or frames inside the case and you want a compact stop that doesn’t show—especially on new or sturdier furniture where a few extra holes are acceptable. |
| Simple wooden stops (blocks or pads, glued or screwed) | Wood blocks or strips, often of a species similar to the case; they feel more integrated and less “hardware-like” than metal. | Can usually be hidden on interior rails, back pieces, or under web frames; if placed just behind the drawer front, they’re discreet unless you peer inside. | Easy to trim, re‑shape, or re‑glue; screw‑fixed blocks leave screw holes, but glued blocks can often be removed and surfaces lightly cleaned. | Spread load over a larger area, so they’re generally kinder to old wood; still risky if you drive big screws into thin rails or decorative faces. | A good first option when you’re working on a genuinely antique piece and want a reversible, visually sympathetic stop that can use existing rails, runners, or back rails without adding obvious modern hardware. |
For genuine antiques, I usually lean toward solutions that keep fresh holes and deep prongs away from old rails and decorative fronts. Small wooden blocks, carefully glued or lightly screwed to hidden rails or back pieces, let the drawer front strike a broad, forgiving surface instead of a sharp metal tab. If I do use metal, I look for short prongs and mount them only in thick, hidden interior wood where a few tiny holes won’t matter if someone ever reverses the work.
On newly built furniture in an antique style, I’m comfortable reversing that priority. Robust, adjustable metal stops designed around modern runners can make fine‑tuning travel much easier, and there’s far less downside to adding or re‑drilling hardware on fresh stock. In both cases, I treat “antique style” marketing language on DHgate listings as description, not proof—finish, dimensions, and how the stop will actually meet your drawer matter more than any claim of authenticity or guaranteed lifespan.
Quick pre‑purchase check of your antique drawer
- Carefully remove the drawer, supporting its weight as you slide it out, and watch how it rides—on side rails, bottom runners, or a framed opening—without trying to correct any wobble or sticking yet.
- Identify rails, runners, web frames, and any back rails in the case, paying special attention to hidden interior surfaces where a stop could touch the drawer front or side without being seen when the drawer is closed.
- Scan those areas for existing holes, tiny tacks, wear grooves, or “ghost” outlines in the wood that show where past stops or guides may have lived; re‑using those spots is often the least intrusive option.
- Measure key dimensions with a ruler or tape: how far the drawer currently travels past where you’d like it to stop, the thickness of any rail or side where a stop might mount, and the depth available behind the drawer front for a block or prong head before it would show or hit something else.
- Write these observations and measurements down so you can compare them directly with DHgate listing specifications later. Prioritise sturdy, hidden contact points, and avoid thin rails, decorative moldings, or visible faces when deciding where any new stop will touch or mount.
Avoiding common fit and installation problems
- Avoid driving long prongs or tacks into thin, dry rails or sides. Old case wood is often brittle; forcing hardware hard enough to “feel solid” can split the rail or telegraph cracks onto visible faces.
- Match stop height and projection to the position you want the drawer front to finish. A stop that sits too proud will leave the front sticking out; one that is too short can let the drawer sink back and misalign reveals or moldings.
- Keep wooden blocks and any hardware away from carved, veneered, or otherwise delicate fronts and edges. If the stop scrapes decorative work each time the drawer closes, it will quickly leave visible wear or damage.
- Before ordering, compare prong length to the actual thickness of the rail or side you measured, check stop height against the gap you want behind the drawer front, and choose mounting points that are hidden and clear of runners, guides, and ornament.
- For valuable antiques, it is safer to under‑engineer the stop—accepting slightly less precise travel—than to risk new holes or visible scars. If you see loose fronts, broken runners, or other structural problems, treat those as a restoration issue and speak with a professional rather than hoping heavier stops will compensate.
How to judge drawer stop listings on DHgate
On DHgate, start by reading product photos and dimension diagrams closely. Look for prong length and spacing on single‑ and double‑point stops, head size and thickness, and how far the stop projects relative to the clearances you measured on your drawer. Those numbers should make sense against your rail thickness, available depth behind the front, and any runners or frames nearby.
Pay attention to stated materials and finishes—such as flat steel versus generic alloy, and any plating or color—and use close‑up photos to judge edge quality and finish. Clean edges and an even surface usually signal better machining than rough burrs, sharp corners, or patchy plating.
Favor listings that combine clear measurements, multiple detailed photos, and straightforward descriptions over sparse or vague ones, and cross‑check every spec against your notes from inspecting the furniture. Then look at buyer feedback and seller ratings as relative indicators: comments about fit, sturdiness, splitting wood, or misaligned drawers can reveal practical issues, but they remain anecdotal and may not match your exact piece.
Treat phrases like “antique style” as a visual cue rather than proof of authenticity or safety, and assume that no listing can guarantee suitability for every antique. DHgate’s platform safeguards around orders and disputes are a backstop, not a substitute for careful product evaluation, so rely first on clear specs, honest photos, and consistent positive feedback when judging drawer stops for an older piece.
Go‑to drawer stop options for common antique situations
- Metal single‑point or double‑point hammer‑in stops on solid, hidden interior rails when you want compact, durable hardware and are comfortable with small, reversible prongs in non‑decorative wood. This suits drawers with sound rails where the stop can sit out of sight and bite into firm material without risking a visible face.
- Small, shaped wooden blocks glued or lightly screwed to hidden surfaces—such as the top edge of a rail, the inside of a web frame, or directly behind the drawer front—for antiques with fragile, thin, or highly decorative wood. These are easy to size, remove, or replace and keep wood‑on‑wood contact that feels more in character with older pieces.
- Using or subtly adjusting existing cabinet structures as back stops—like a rear cross rail, a web frame member, or a fixed block already inside the case—when these already limit travel and only need a minor shim or repositioning. This avoids adding any new hardware and keeps intervention minimal and reversible.
- Treat these as starting points, not rules. I would rather preserve original surfaces and avoid new visible holes, even if that means slightly less adjustable or convenient stops on a true antique. If you are building new furniture in an antique style instead, it can be reasonable to reverse that priority and choose more adjustable modern hardware, because you can design rails and frames to suit the hardware from the start.
FAQ: originality, necessity, and mixing old with new
Do all antique drawers need added stops?
No. Many antiques work well enough without extra stops, especially if the drawer already closes flush and over‑travel isn’t damaging the case, rails, or wiring or posing a safety issue. I’d only add stops when a drawer slides dangerously far, threatens to chip moldings or veneer, or feels unstable; in those cases, a simple, reversible stop is usually enough.
Do I have to find original or period‑correct drawer stops for my antique?
For everyday home use, you generally don’t need exact period hardware. Sympathetic, reversible replacements—small metal tabs on hidden rails or discreet wooden blocks that can be removed with minimal marking—are usually a reasonable compromise between originality and safe function. If the piece is high‑value, has clear provenance, or you’re concerned about appraisal and resale, it’s better to ask a professional restorer or appraiser before changing any hardware.
Is it acceptable to mix modern drawer stops with older furniture?
Yes, provided the hardware respects the existing structure and can be removed without major scars. Modern stops can be a practical choice if they mount on hidden, solid wood, don’t demand large new holes in visible faces, and look reasonably in keeping with the rest of the piece when the drawer is open. I’d avoid any solution that forces you to cut away original frames, drill through decorative fronts, or permanently alter rare hardware just to fit a stop.
How much can replacement hardware affect an antique’s value?
There isn’t a single rule: small, reversible changes often matter very little for ordinary household pieces, but heavy alterations or obvious modern hardware can concern collectors and appraisers. The impact depends on the furniture’s rarity, provenance, and how easily the work can be undone. If value or authenticity is a major goal, use DHgate for low‑impact parts only and let a qualified restorer handle anything structural or hard to reverse.
What matters most for a typical home restoration: originality or function?
For most household antiques, I would put structural preservation and reversibility first, then reliable function, and treat strict originality as a bonus. In practice, that means choosing stops that prevent damage, use hidden mount points, and can be removed later, even if they aren’t exact period copies. You can still use DHgate to find hardware that looks appropriate, but the key test is whether your changes can be undone without leaving obvious scars if someone someday wants a more purist restoration.