
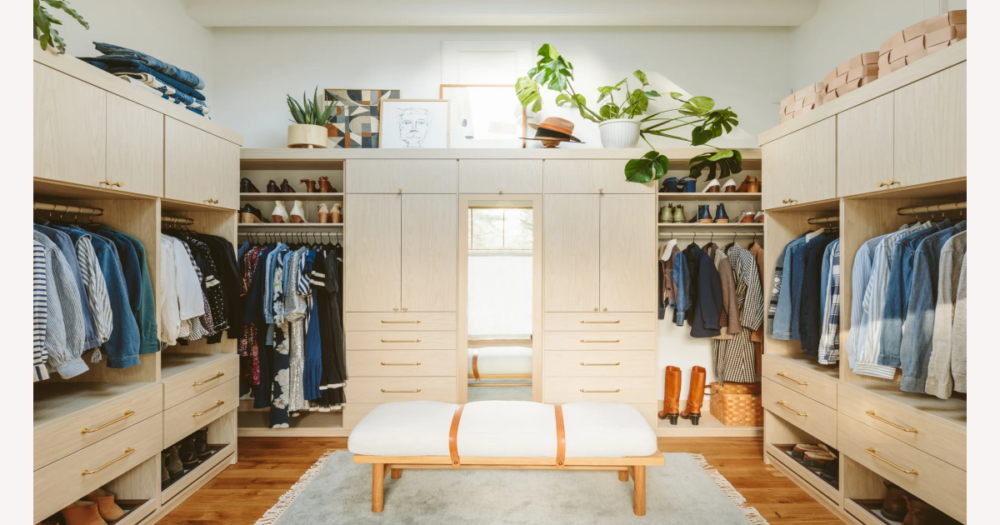
To choose the right coat hangers and clothing racks for a walk-in closet on DHgate, start by defining what the space has to do: measure roughly how much width and depth you have, note the walkway you must keep clear, and map where heavy coats, suits, dresses and everyday tops will hang. Then decide how much a matching, coherent look matters to you and whether you’re willing to pay a bit more for stronger materials. With those priorities set, you can favour sturdy, well-proportioned hangers and stable, wall-hugging racks that fit your closet’s limits, instead of random multipacks or bulky pieces that make the room feel cramped or unstable.
Set your walk-in closet priorities before choosing hangers and racks
On DHgate, you’re not just buying a few packs of hangers or a random clothing rack—you’re deciding how your whole walk-in closet will work. Start by defining the space you have, the clothes that need hanging, and how calm and coherent you want the closet to look. That frame makes it much easier to ignore flashy, ultra-cheap options that won’t actually fit or feel stable once they’re in the room.
Start with space. Note the internal width and depth of the closet, roughly how wide each wall segment is, and how much walkway you need to keep clear so you can turn and reach for clothes comfortably. Pay attention to doors and drawers that swing into the space: sliding doors, hinged doors, or pull-out drawers can easily clash with deep racks or rails mounted too close to the opening.
Then consider the clothes. Estimate how many long, heavy pieces you have—coats, suits, long dresses—versus lighter tops, shirts, blouses, and trousers. Decide where those clusters should live: heavier items usually belong on the strongest rails, ideally along the sides or back where a bit of extra depth is less likely to block movement, while lighter everyday pieces can go on slimmer hangers in the most accessible zones. This rough map will later guide which parts of the closet need higher-capacity hardware and thicker-shouldered hangers.
Now weigh look against budget. Ask yourself how much matching hangers matter visually and whether you’re willing to pay a bit more for wood or strong metal instead of the cheapest plastic. Matching or mostly matching hangers generally create a calmer, less cluttered feel, and stronger materials usually support heavy garments better. If walkways are tight, slimmer hangers and wall-hugging rails become more important than decorative, bulky pieces; if you own many heavy garments, thicker hangers and sturdier rack formats matter more than squeezing in maximum hanger count.
My own bias is to prioritise stability and a coherent look over ultra-low prices or lots of decorative variety. I would rather slightly overbuild strength—choosing well-proportioned hangers and stable racks that feel solid—than risk wobble, sagging rails, or a walkway that feels crowded. The rest of this guide will help you turn these priorities into specific hanger materials, rack formats, and DHgate checks, so you can browse listings with a clear plan instead of general decluttering theory.
Match hanger materials and shapes to your clothes and closet space
Once you know what your walk-in closet needs to do, match hanger materials and shapes to your garments and space rather than trusting any pack marketed as “for everything.” Plastic hangers are light, inexpensive and often very slim, which makes them useful for shirts and blouses when you want to keep rails visually clean and maximise count. The trade-off is strength: cheaper plastic can flex under heavy coats or even snap if you overload it, so it’s best kept for lighter items.
Velvet or fabric-covered hangers add grip. Their slim padded surface helps slippery fabrics—like silky blouses or lightweight dresses—stay put instead of sliding to one side. However, that soft coating can compress thick shoulders, so bulky knits and structured jackets may end up with squashed seams, and low-quality flocking can shed or leave marks. Reserve these for lighter, slippery pieces rather than your heaviest garments.
Wooden hangers are thicker and more stable, and they’re usually kinder to shaped shoulders. Broader wooden profiles spread weight across the garment, making them ideal for coats, jackets and suits that you want to keep crisp. The obvious downside is bulk: you’ll fit fewer wooden hangers per rail, which matters in a compact walk-in, but the trade-off is better support and a more substantial feel when you reach for heavier items.
Metal hangers can be both slim and strong if they’re well-made, which is useful when you’re trying to save space but still need more rigidity than basic plastic. Bare, very thin metal can leave shoulder bumps or sharp creases unless the hanger is contoured or coated, so look for designs with shaped shoulders, rubberised or plastic sleeves, or integrated bars and clips that spread the load rather than acting like a wire.
Shape matters as much as material. Contoured shoulders follow the natural curve of jackets and dresses, helping prevent dimpling and hanger marks; flat shoulders maximise how many hangers you can line up, but they’re more likely to distort delicate or structured pieces. Notches help hold straps in place, trouser bars (with or without clips) let you hang pants without folding them over random rails, and swivel hooks make it easier to align hangers neatly along different rails. In practice, I prefer broader, more contoured hangers anywhere clothes are heavy or important, even if that means fewer garments per rail, and I reserve ultra-slim hangers for lighter everyday tops where space matters more than perfect shaping. Mixing one or two main types that suit your wardrobe and closet dimensions will still look cohesive and is usually smarter than buying a single-material multipack and expecting it to work for every garment.
Measure your walk-in closet and translate it into hanger and rack needs
- Measure the structure of the walk-in using a tape measure. Note the internal width of each wall section, the full depth from the back wall to the point where doors or frames start, and the ceiling height. If rails already exist, record their heights from the floor. Stand in the space and check how far doors swing, then decide the minimum clear walkway you want to keep clear (often at least 80–90 cm in front of hanging clothes).
- Use your height measurements to sketch rail positions. For short-hang areas (shirts, blouses, trousers folded over a bar), a rail roughly 100–120 cm from the floor usually keeps hems clear and easy to reach. For long-hang areas (dresses, coats), aim closer to 160–180 cm and confirm that the longest pieces still sit a few centimetres above the floor. In double-hang zones, place a short rail below and a second rail above, leaving enough space between them that garments don’t overlap or drag on each other.
- Compare hanger and garment depth with the closet’s depth so clothes don’t jut into the walkway. Add together the approximate depth of a loaded hanger plus the thickness of typical garments, then compare that number with your measured closet depth. For freestanding racks, look for product depth measurements and check that a loaded rack will sit entirely within the available depth without doors hitting clothes or forcing you to squeeze past them.
- Estimate a realistic number of hangers per rail instead of packing the width to the millimetre. As a simple rule of thumb, allow a finger or two of space between most garments when they’re hanging, and assume bulky knits and coats take more room than shirts or blouses. Use your measured rail width to set a rough upper limit, then mentally subtract a little to keep the rail breathable and easier to use.
- Finally, reconnect the numbers to your priorities. If your measurements show a tight walkway, cap how many rails or racks you install and favour wall-mounted or built-in solutions that sit close to the walls rather than deep freestanding racks in the centre. If there’s generous depth, you can be more flexible with rack formats and hanger thickness, but still keep clear paths where you move and open doors.
Choose between freestanding racks, wall-mounted rails, and built-in systems
| Format | How it uses space | Stability and installation | Best for |
|---|---|---|---|
| Freestanding rack | Stands on the floor and projects into the room, so it can eat into the walkway if depth is limited. Easy to slide or rotate as your layout changes, but multiple racks can quickly make a small walk-in feel crowded. | Stability depends heavily on the base design, frame thickness and how evenly you load it. Assembly is usually simple, but a light frame or narrow base can wobble or tip if you hang many heavy pieces on one side. | Renters or temporary setups where drilling into walls isn’t allowed, overflow storage for seasonal items, or adding a small extra hanging zone in a spacious walk-in with plenty of floor area. |
| Wall-mounted rail | Uses wall space efficiently and keeps the floor mostly clear, which helps preserve a clean walkway. You can set heights to match short- and long-hang zones based on your measurements. | Generally more stable than a freestanding rack when properly anchored, because weight is transferred into the wall. Installation requires finding solid mounting points (studs or strong anchors) and using suitable fixings; poor installation can undermine otherwise good hardware. | Permanent or semi-permanent layouts in walk-ins where you want clear floor space, customised rail heights, and stronger support for heavier garments and sturdy hangers without adding bulky frames. |
| Built-in system | Integrates rails, shelves and sometimes drawers into the closet structure, making strong use of vertical space and keeping most elements close to the walls. A well-designed system can turn odd corners into usable hanging zones without blocking movement. | Usually the most stable option because rails and supports are part of a planned structure, often fixed into walls or floor. Installation may be more involved, with planning, tools and sometimes professional help, but once in place it tends to feel solid over time. | Long-term walk-in closets where you care about stability, a coherent look and efficient use of every section of wall. Best when you’ve measured carefully, chosen hanger types, and want a layout that won’t change much beyond minor adjustments. |
Check load capacity and avoid overloading hangers and racks
Treat any stated “maximum static load” on hangers or racks as an approximate ceiling under ideal conditions, not a weight you should aim to reach. Static load usually assumes evenly distributed weight, a solid mounting surface, and no one bumping or pulling on the rail, so real-life use in a walk-in closet is almost always harsher than the spec sheet implies.
Use your strongest hardware wherever weight will concentrate. For heavy coats, suits, and dense fabrics, prioritise thicker metal or solid-wood rails and well-anchored wall-mounted or built-in systems over light freestanding racks. Keep lighter-duty racks and slimmer hangers for shirts, blouses and other low-weight pieces so you’re not asking them to do a job they weren’t designed for.
Spread heavy garments out instead of clustering them. Avoid hanging all coats in the middle of one long span or on one side of a freestanding rack; mix lighter pieces between heavier items and, if possible, divide weight across several rail sections or more than one rack so no single point is carrying most of the load.
Watch for simple signs that you are overloading hardware: rails starting to bow, joints creaking when you move hangers, bases lifting slightly at one edge, or a noticeable wobble when you touch or bump the rack. If you see any of these, move some weight elsewhere or remove a few items rather than waiting for a sudden bend or failure.
I would rather underload every rail and rack—leaving visible spare capacity or adding an extra rail—than run hardware close to its claimed limits for months. Building in that margin may mean buying one more hanging section than the bare minimum, but it keeps both your closet and your clothes safer over time.
Plan your hanger mix and rack layout by garment category
- List your main garment categories—such as coats and jackets, shirts and blouses, dresses, trousers, and accessories—and jot down rough item counts for each so you know what the system needs to handle.
- Assign suitable hanger types to each category using earlier guidance: broad wooden or contoured hangers for coats and structured jackets, slim velvet or plastic hangers for shirts and blouses, clip or bar hangers for trousers, and only a few speciality hangers for accessories where they genuinely help.
- Map each category to a rail or rack zone at an appropriate height, separating short-hang (shirts, jackets, trousers folded over bars) from long-hang (dresses, coats) based on the measurements you already took for your walk-in closet.
- Estimate how many hangers to buy per category from your counts, then add a modest buffer—enough spare hangers to cover laundry days and a few new pieces without crowding the rails or pushing them towards overload.
- Keep the plan simple and coherent by repeating a limited palette of hanger types across zones. Aim to leave with a concise shopping note such as “40 slim shirt hangers, 20 broad-shoulder coat hangers, 10 trouser clip hangers, 2 wall rails, 1 guest rack,” and use that as your reference when browsing DHgate listings.
Watch for stability, bulk, and obstruction risks in product listings
- Treat very thick or heavily padded hangers as a capacity risk: they may look luxurious, but each one occupies far more rail space. Use listing photos that show hangers side‑by‑side and any stated thickness measurements to judge how many will realistically fit on your rails.
- Question the stability of any rack with a very small or narrow base, lots of thin joints, or light‑gauge tubing. Even if the description says “heavy‑duty” or “reinforced,” a narrow footprint and spindly tubes are strong clues that it may wobble once loaded.
- Look for concrete stability details in the listing—mentions of cross‑bracing, the width of the base, or the overall weight of the rack. Treat vague claims like “super stable” without photos of bracing or clear dimensions as marketing rather than proof.
- Mentally place each rack or rail into your measured closet. Compare the listed depth and height with your door swings and walkway clearance, and be cautious about putting tall racks in the centre of a standard walk‑in, where they are likely to block movement or feel crowded.
- If photos and specs leave stability ambiguous, especially for racks meant to carry heavy coats or suits, err on the side of skipping the product. Check multiple images and buyer reviews for hints that items look flimsy or oversized compared with the description, and move on if you’re not convinced it will feel solid in your space.
Do DHgate-specific checks before you place an order
On DHgate, start by checking seller reliability before trusting any hanger or rack listing. Look at overall ratings, how many transactions the seller has completed, and recent reviews that mention hangers or clothing racks. Comments about build quality, wobble, and whether items matched their descriptions are more useful than generic praise.
Then verify product details against the plan you’ve made for your walk‑in. Cross‑check listed materials, dimensions, and any load claims with your rail heights, closet depth, and weight preferences. If crucial information such as rail depth, tubing thickness, or base width is unclear, use DHgate’s messaging tools to ask the seller specific questions before you commit.
Review available shipping methods and times, especially if you’re ordering several pieces for the same closet. Slower, cheaper options can make sense for a long‑term project, but it’s worth checking whether combined shipping is offered so costs stay reasonable when you buy multiple packs of hangers or more than one rack.
Finally, be aware that DHgate offers buyer protection and dispute mechanisms if an item arrives significantly different from its listing or is damaged. The exact rules depend on order timing and platform policies, but knowing that a dispute and refund process exists helps you weigh the risk of each purchase without needing a step‑by‑step walkthrough.
I would generally choose a more established DHgate seller with clear specs and multiple honest‑looking photos over the absolute lowest price, especially for large racks or rails that anchor your walk‑in layout. Paying a little more for clearer information and a stronger reputation reduces the chance that your closet plan is undermined by a flimsy or ill‑fitting piece.
Know what listings can and cannot tell you in advance
On DHgate, some details about hangers and racks are usually reliable enough to plan around. Basic dimensions (length, width, height, rail depth), stated materials such as steel, aluminium, plastic or wood, the approximate number of hangers in a pack, and the general style and colour tend to be consistent with what arrives. Those are the specs to compare directly with your closet measurements, load preferences and the overall look you want for your walk‑in.
Other claims sit in a middle zone: they’re helpful for rough comparison but not guarantees. Phrases like “heavy‑duty” or “reinforced,” and stated maximum load capacities, can tell you which option in a seller’s range is meant to be stronger or more robust, but they’re rarely based on independent testing. Treat them as relative signals—Product A is intended to be sturdier than Product B from the same seller—rather than precise weight limits you can safely run at every day.
The most important aspects of real‑world performance can only be judged once the hardware is in your closet. You won’t truly know how much a rack wobbles when bumped, how quickly a rail might start to sag under long‑term weight, whether coatings or velvet flocking will shed or mark certain fabrics, or how straightforward the assembly process feels until you build and use the system. Even good reviews and photos can’t fully capture these long‑term or tactile details.
Because of that uncertainty, I prefer to leave margins rather than pushing everything to the supposed limit. I would avoid ultra‑tight layouts that pack rails to the last centimetre, keep actual loads well below any quoted maximums, and be ready to shift rail positions, redistribute heavy items or add reinforcement brackets if a weak point shows up in everyday use. Planning for adjustment makes DHgate listings useful guides without assuming they can predict exactly how your walk‑in will behave over time.
Quick answers to common walk-in hanger and rack questions
Do all my hangers need to match?
No. Full matching is optional, but a limited set of one to three coordinated hanger types across the closet usually looks calmer and helps clothes sit more evenly. Pick one main style for everyday tops, a sturdier style for coats and jackets, and possibly a specialised option for trousers or dresses. That keeps the system coherent without forcing you to replace every existing hanger at once.
How many spare hangers should I buy?
Aim for a modest buffer rather than filling every rail edge-to-edge from day one. A practical approach is to add roughly 10–20% more hangers than your current garment count or a few extras per category—enough for laundry days, new pieces and occasional guests. If spare hangers start to make rails feel crowded or heavy, it’s a sign to stop adding more and consider an extra rail or rack instead.
Do I need a separate rack if my walk-in already has built-in rails?
Not necessarily. If your built-in rails can hold your wardrobe at sensible heights and loads without bowing or blocking walkways, they are usually enough. An extra freestanding rack or additional rail only makes sense when the existing system would be overloaded, when long pieces drag because there’s no suitable rail height, or when you want a small dedicated area for guests, staging outfits or temporary overflow. If adding a rack would narrow the walkway or interfere with doors, it’s better to adjust the built-in layout instead.