
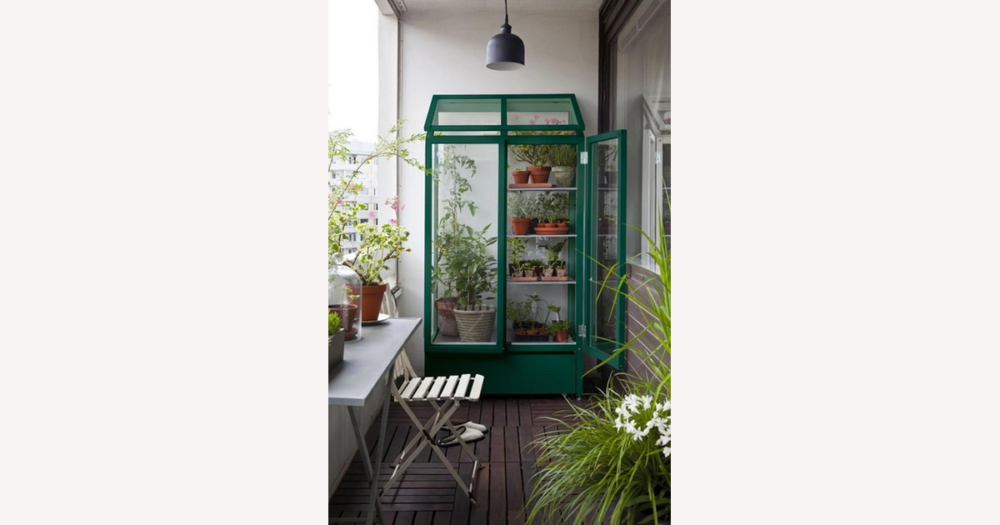
If you’re browsing DHgate for an Ikea-style greenhouse for a tiny balcony, start by choosing the right basic format instead of chasing exact Ikea model names. DHgate sellers offer lookalike tabletop boxes, narrow glass-and-metal cabinets, and covered shelving units; picking a compact vertical design that fits your balcony’s footprint and exposure makes installation safer and more satisfying than simply buying the cutest mini greenhouse you see.
Choose the right Ikea‑style greenhouse format for your balcony
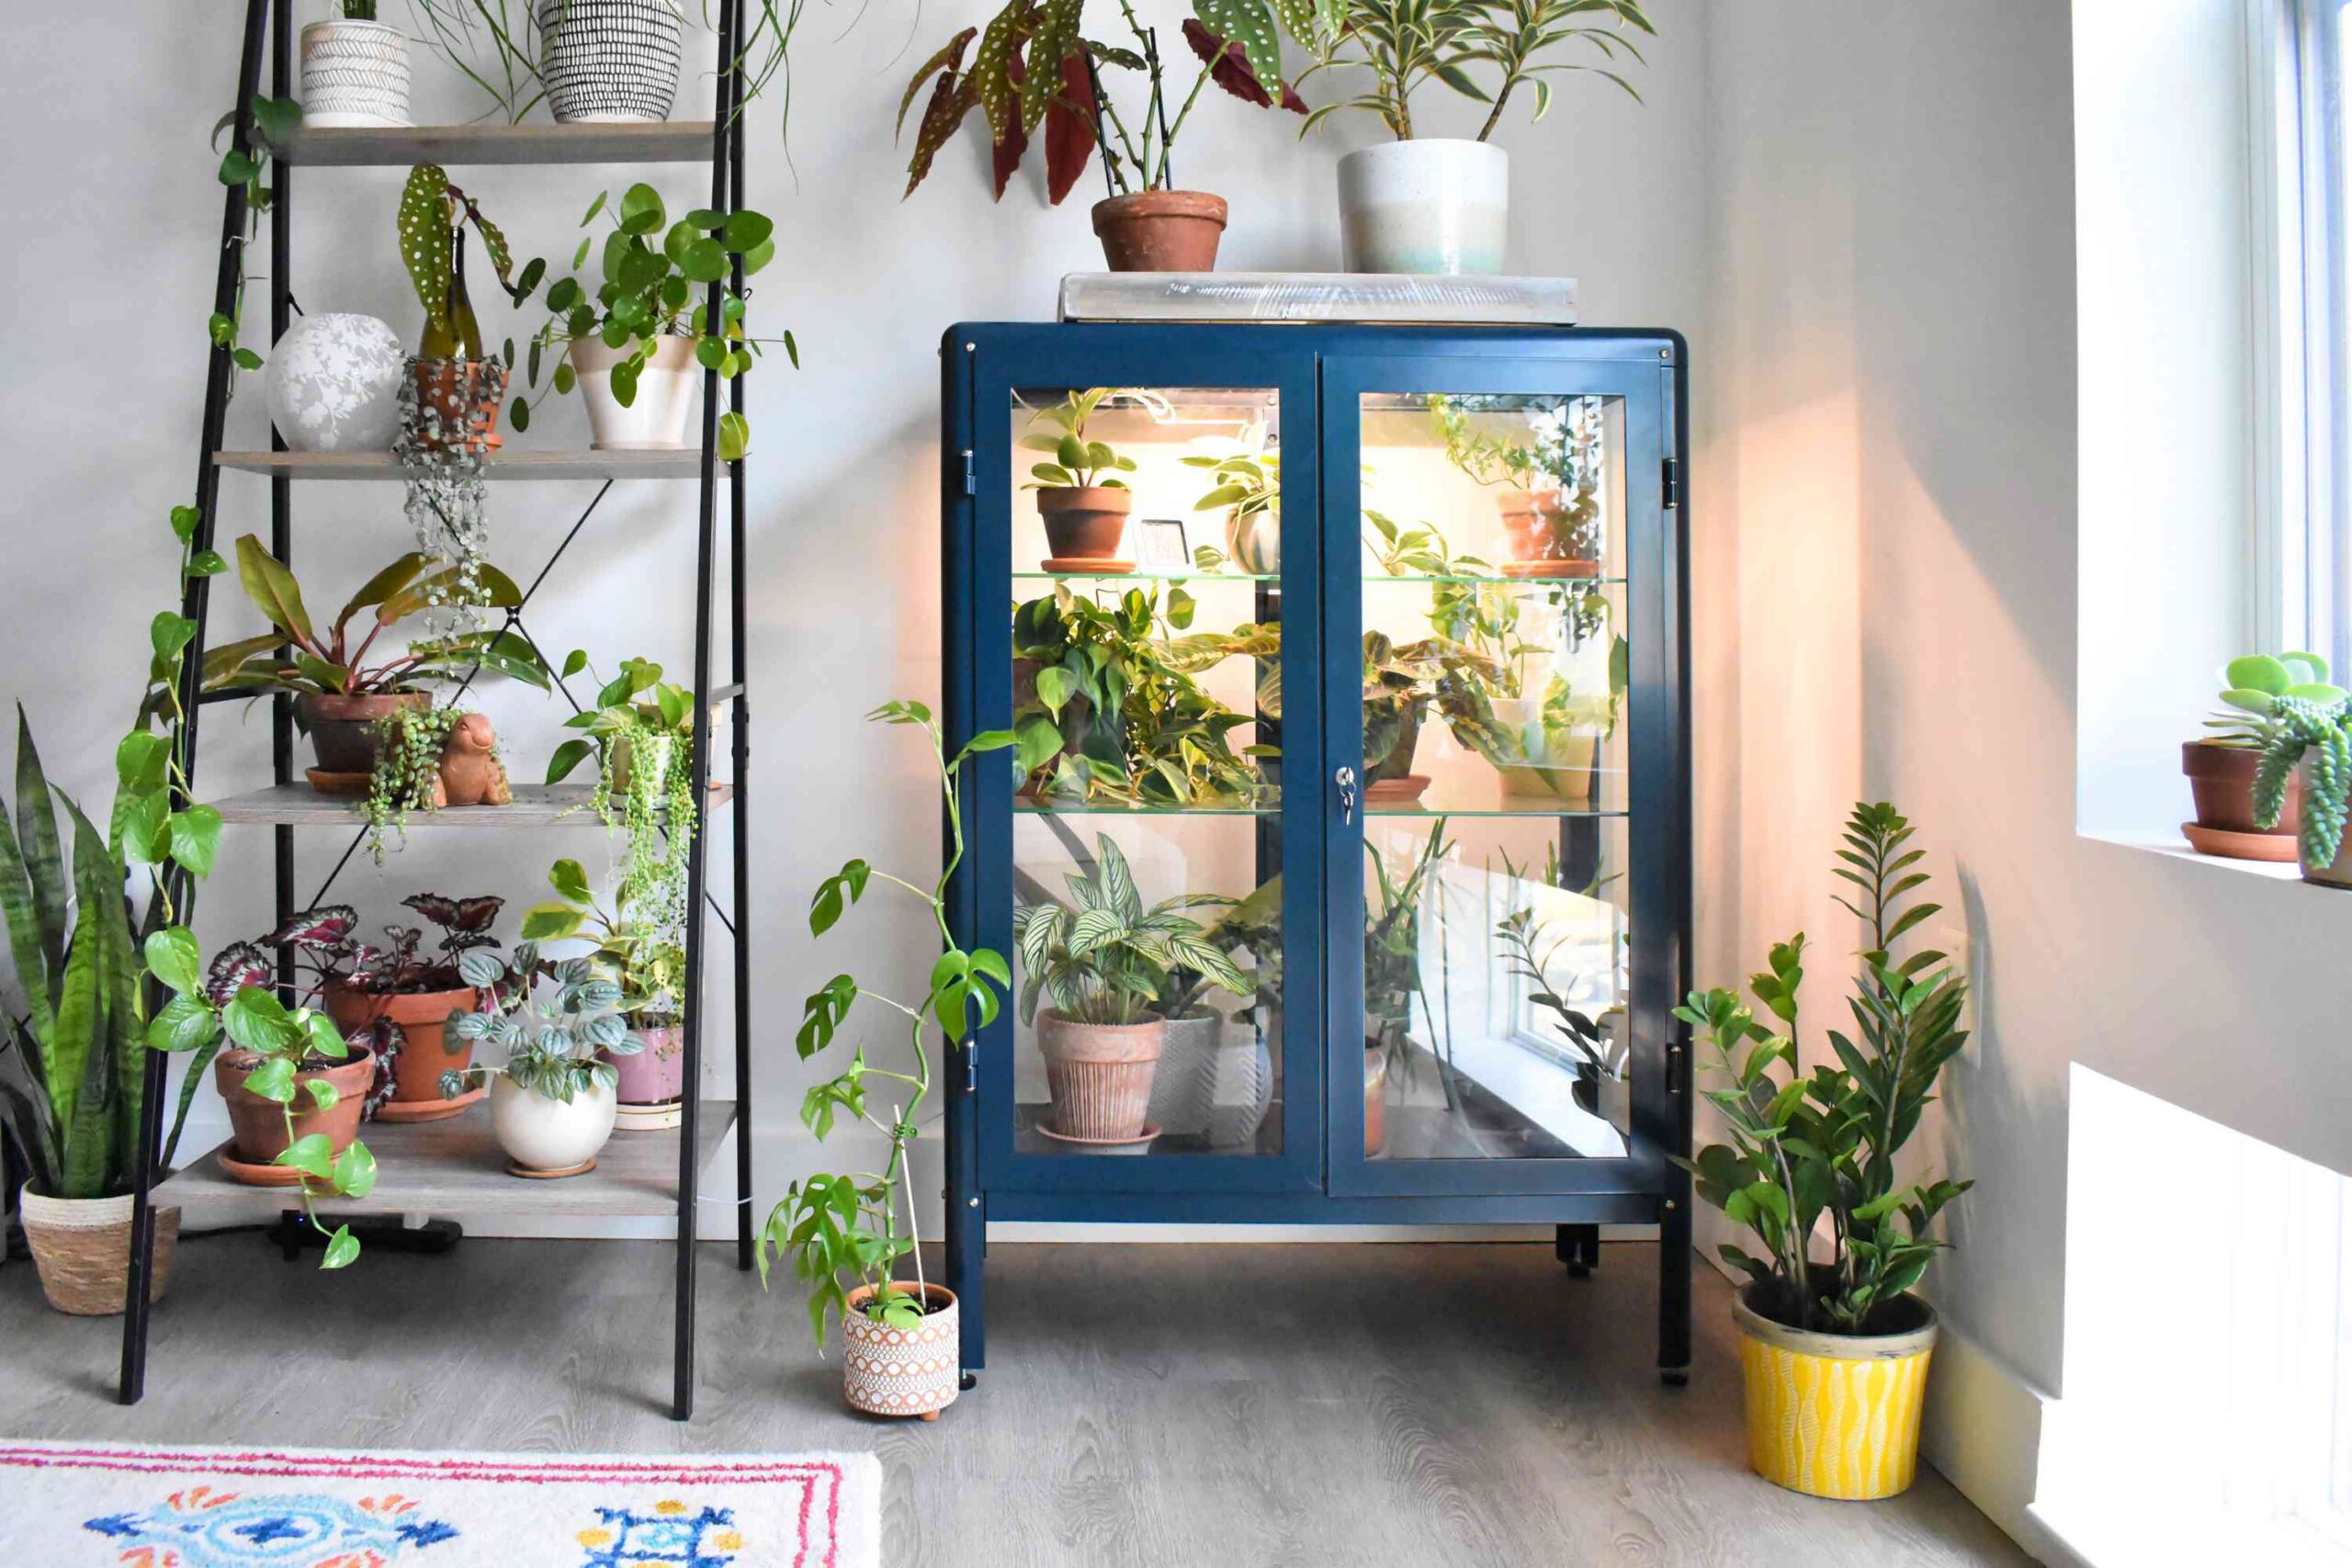
Three common Ikea-style balcony greenhouse formats: a small tabletop box, a narrow glass-and-metal cabinet, and a tall shelving unit with a fitted cover.
When people talk about an “Ikea greenhouse” for a balcony, they usually mean one of three ideas: a mini tabletop box with clear panels, a narrow glass-and-metal cabinet turned into a greenhouse, or a vertical metal shelving unit wrapped in a fitted cover. On DHgate you’ll find lookalike versions of all three, so it helps to think in these generic formats instead of specific Ikea model names.
A tabletop mini greenhouse has the smallest footprint. It sits on an existing surface—a table, shelf, or wide rail—so the unit itself doesn’t take up floor space, but you do need enough depth for the base plus lid swing and room for your hands. Because it’s short, you usually get one or two usable levels of plants, and the sides are relatively exposed to wind and rain unless the balcony is very sheltered.
Narrow cabinet-style greenhouses stand on the floor and use vertical height: several shelves behind doors in a compact footprint. They can sit close to a wall or railing without feeling cramped, as long as doors can open fully. The enclosure gives much better protection from drafts and rain than a decorative mini box, but taller cabinets demand stable floors, good leveling, and enough clearance above and to the sides to avoid bumping or tipping.
Shelving-based greenhouses with a fitted cover work like open racks wrapped in plastic or fabric. Their footprint is similar to a slim storage shelf, and you can often adjust shelf spacing to stack plants vertically. The cover offers more shelter than a bare shelf but usually less than solid glass or metal doors, so they’re best on balconies that are partly shielded rather than fully exposed to harsh wind.
For most tiny balconies where outdoor conditions matter, I would favor a compact vertical format—a narrow cabinet or sturdy shelving unit with a proper cover—over a purely decorative tabletop box. You gain more usable height in the same floor area and better protection for plants and materials. Tabletop mini greenhouses are still a reasonable choice on ultra-shallow or very sheltered balconies, as long as they sit securely on a strong, wide surface. Once you’ve settled on a format, the next step is matching it to your exact balcony layout and exposure so you can narrow your options on DHgate.
Match greenhouse types to your specific balcony layout
| Greenhouse type | Footprint and clearance | Usable height | Wind and rain exposure | Installation and anchoring effort |
|---|---|---|---|---|
| Tabletop mini greenhouse box | Uses no floor space but needs a sturdy table, shelf, or wide rail; allow extra depth for the base and lid swing, plus hand room at the front. | Typically one to two levels of plants; stacking too high makes access awkward on a small balcony. | Offers light shelter from above and partially from the sides; plants and structure stay quite exposed on windy or rain-hit balconies. | Usually just placed on a surface; benefit from non-slip pads or added weight, and you must ensure the supporting furniture and rail can safely handle the load. |
| Narrow cabinet greenhouse | Slim floor footprint that suits long, shallow balconies; needs door swing clearance and a few centimetres behind for air and drainage, without blocking walkways. | Multiple shelves from floor to near eye level, giving several realistic tiers of plants in the same footprint. | Doors and side panels provide strong enclosure from wind and direct rain; still relies on balcony position for protection from extreme weather. | Requires careful assembly and leveling; best stood against a wall or in a corner, sometimes weighted or discreetly tied back so it cannot tip if bumped or caught by gusts. |
| Shelving unit with cover | Footprint similar to a storage rack; needs depth for shelves plus extra room for the cover and zip opening, and some side clearance to avoid snagging the material. | Adjustable shelves can create three or more usable tiers, though very high levels may be awkward to reach on tight balconies. | Cover provides moderate protection from wind and splash, but seams and openings make it less sealed than a solid cabinet; more suitable for partly sheltered balconies. | Assembly is straightforward, but the frame benefits from good leveling and sometimes extra weighting or tie-downs; the cover must be secured so it doesn’t flap or tear in strong wind. |
On micro-balconies that only have a rail or tiny table, a tabletop mini greenhouse is the most practical option: it keeps plants off the floor and can look charming as long as the surface is wide, strong, and sheltered enough that the unit won’t wobble or blow over. It also suits fully enclosed or partly indoor balconies where weather is mild and you mainly want a decorative display.
If your balcony is long but shallow, with a wall or corner available, a narrow cabinet greenhouse makes better use of the space. It stands tight to the wall, adds height instead of width, and its doors and panels protect plants and metal parts from drafts and rain. This format works particularly well where you can tuck the cabinet out of the main walkway but still open the doors fully.
Covered shelving units fit broader balconies or layouts where you want modular, potentially movable plant storage. You can line them along a wall or divide the space, adjusting shelf spacing as your collection grows. They’re a good compromise for semi-exposed balconies: more protective than bare shelves, less rigid and enclosed than a glass cabinet.
On very exposed, windy, or rain-hit balconies, I would be cautious with thin, decorative mini greenhouses. A sturdier enclosed cabinet or solid shelving frame with a well-secured cover is generally safer and more durable. Fully exposed high-rise balconies can push the limits of typical Ikea-style designs altogether; in those cases you may need extra weighting, more robust outdoor hardware, or to rethink using a greenhouse at all. Whatever format you choose, the next step is to read DHgate listing dimensions and materials carefully so you don’t end up with something too large, too light, or poorly coated for your balcony.
Check DHgate specs and materials for balcony compatibility
- Measure your balcony width, depth, and usable height, then compare each number carefully with the greenhouse dimensions shown on the DHgate listing, including door or lid swing and any roof or shelf overhang; leave a small margin so nothing hits railings or walls when opened.
- Check the listed product weight and mentally add the load of pots, soil, and water; keep the total within what your balcony floor and any supporting table or shelf can safely bear, and avoid hanging or clamping heavy units directly to railings unless the design explicitly states this is supported.
- Review the frame material and coating, favouring rust-resistant options such as powder-coated steel or aluminum, and being cautious about descriptions that suggest bare or lightly treated metal if your balcony is exposed to rain or humidity.
- Identify the panel material—glass or plastics like acrylic or polycarbonate—and note any thickness information; remember that glass is clearer and more scratch-resistant but heavier and more fragile, while sturdy plastic or tempered glass usually suits exposed balconies better.
- Look closely at photos or diagrams to see how doors, vents, and openings work, checking that there is some ventilation to prevent overheating in sun while still giving plants protection from rain and wind.
- Confirm that the listing clearly specifies included hardware such as screws, brackets, and any anchoring pieces, and treat vague or incomplete hardware descriptions as a warning sign that installation may be harder or less secure.
More exposed balconies, especially on higher floors, usually need sturdier frames with good anti-corrosion protection and panels that are fixed securely so they do not rattle or flex in the wind. Sheltered or partly indoor balconies can tolerate lighter, more decorative builds because they are less directly hit by rain and gusts.
On DHgate, I would prioritise listings with clear spec tables, close-up photos of the metal finish and panel edges, and explicit hardware descriptions, and skip anything that looks thin, poorly coated, or ambiguous about how it is put together for the level of exposure your balcony actually has.
Once a greenhouse passes these spec and material checks and seems suitable for your space, follow a careful installation sequence to place and secure it safely on the balcony.
Plan and install your balcony greenhouse step by step
- Pre-planning: re-confirm the measurements of the exact balcony spot you want to use, note nearby railings, drains, doors, and windows, and review building or landlord rules that might restrict fixtures, drilling, or added structures.
- Surface prep: clean and dry the balcony floor, check that it is reasonably level, and avoid positioning the greenhouse directly over drains or areas where water regularly pools.
- Unpacking and inspection: when the greenhouse arrives, unpack it carefully, inspect panels and frame parts for cracks, warping, or bent corners, and verify that all screws, brackets, and other hardware are present before you begin assembly.
- Assembly: follow the manufacturer’s instructions on a flat surface, tightening screws gradually and avoiding overtightening near glass or plastic panels; for tall or heavy units, ask a second person to help hold sections steady while you fix them together.
- Positioning: once assembled, move the unit into its planned spot, keeping a safe distance from balcony edges and, where possible, standing it against a wall or into a corner to gain extra stability.
- Leveling and anchoring: check that the greenhouse sits level using a bubble level or a careful visual check; if the design allows, use manufacturer-provided brackets or add discreet weights at the base to reduce wobble, always respecting any rules about fixing items to walls or railings.
- Final clearance and access check: open doors or lids fully to confirm they do not hit railings or walls, make sure the greenhouse does not block balcony doors or escape routes, and test that you can reach plants comfortably for watering and maintenance without awkward stretching.
Short timelapse-style video showing a mini greenhouse being assembled and used, useful for visualising how frame parts, panels, and doors come together before you repeat similar motions on your balcony.
Respect key balcony safety and practicality limits
- Keep total weight within sensible balcony load limits. Tall cabinets packed with pots, soil, and water become very heavy; concentrate that weight near structural walls or corners, not at cantilevered edges or over balcony membranes that may not be designed for heavy loads.
- In high, exposed locations, treat wind as a real tipping risk. Tall or lightly built greenhouses should be braced against a wall, weighted at the base, or secured with the manufacturer’s brackets; if you cannot anchor the unit meaningfully, choose a shorter, sturdier design or abandon the balcony greenhouse idea.
- Never place heavy or glass-panel greenhouses on railings or narrow ledges. A bump, strong gust, or ice buildup could send the unit over the edge, creating a serious hazard below.
- Do not block balcony doors, windows used as exits, or the main walking path. If installing a greenhouse would force you to squeeze past it, limit door swing, or climb around it, the safer move is to pick a smaller unit or skip the greenhouse entirely.
- Respect building and landlord rules. Check any restrictions on drilling, bolting, or adding structures, and avoid unauthorized anchoring methods that could damage walls, railings, or waterproofing or violate your lease.
- If you cannot keep weight close to structural supports, secure the greenhouse against wind, keep it off railings and ledges, and maintain clear access while staying within building rules, the safest decision is a lighter, more sheltered setup—or no balcony greenhouse at all.
Use DHgate buyer checks and protections wisely
On DHgate, start by treating seller reputation as a basic safety filter. Prefer sellers with a solid order history, consistently high ratings, and reviews that mention build quality and packaging for similar furniture or greenhouse-style items, not just fast shipping or low price.
Next, scan the listing itself. A balcony greenhouse is too big and fragile to buy from vague specs: look for multiple clear photos from different angles, dimension diagrams, specific material descriptions for the frame and panels, and a hardware list that matches the installation checklist you used earlier.
Use listing Q&A or direct messaging to confirm key details like exact dimensions, metal type, panel material, and whether replacement parts or extra hardware are available. Keep screenshots or copies of these messages so you have evidence if you need to challenge a “not as described” order later.
For designs with glass or rigid plastic panels, check that shipping and packaging sound robust. Reviews and descriptions that mention foam inserts, corner protectors, or double boxing are reassuring; repeated complaints about cracked panels or bent frames are a strong sign to walk away.
DHgate offers order protection so you can open a dispute if an item arrives damaged or does not match the description. When your greenhouse is delivered, photograph the package before opening, document any visible damage, keep all packaging until you have fully checked the unit, and submit clear photos with your dispute if something is wrong.
If a listing has few photos, inconsistent dimensions, vague material notes, or repeated reports of damage in transit, skip it—even if the price looks tempting. Once you find a well-documented listing from a reliable seller and the greenhouse arrives, run simple in-home stability and build checks after assembly.
Verify stability and build quality after assembly
- Stability test: gently push the greenhouse from different angles at mid-height to check for wobble or tipping; if movement feels significant, adjust anchoring or weighting, or reconsider using that unit on the balcony.
- Door and lid operation: open and close doors or lids fully to confirm smooth movement, proper alignment, and sufficient clearance from walls, railings, and nearby furniture.
- Panel fit and seals: inspect glass or plastic panels for gaps, rattling, or uneven fit and confirm that clips, seals, or retainers are properly engaged.
- Hardware check: look over screws, brackets, and joints to ensure they are tightened appropriately, noting any missing or stripped hardware that should be replaced before regular use.
- Coating and sharp edges: examine metal surfaces near joints and corners for chipped coating, early rust spots, or sharp edges that could catch hands or tools, and address issues before loading plants.
- If the greenhouse fails any of these simple checks, pause use and either adjust the setup or pursue a return or dispute instead of accepting a wobbly or poorly finished unit on a balcony.
FAQ: Handling tricky balcony situations and common doubts
Does my balcony need a fully enclosed greenhouse cabinet, or can I use open shelves with a cover?
You don’t always need a fully enclosed cabinet. On a mild, well‑sheltered balcony—such as one partially indoors or shielded by walls—a sturdy shelving unit with a good‑quality fitted cover can be enough to protect plants and the structure. In harsher or windier conditions, especially on higher floors, a more enclosed cabinet‑style greenhouse with solid doors and panels is usually safer and more durable. If wind regularly moves lightweight furniture or rain drives in sideways, treat a fully enclosed, well‑anchored design as the default and use covered open shelves only for very light, non‑fragile setups.
What if my balcony is extremely shallow?
On very shallow balconies, floor‑standing greenhouses are often impractical because they block movement or door swing. Realistic options include a single slim tabletop mini greenhouse placed on a strong, wide rail or table, wall‑mounted planters instead of any freestanding greenhouse, or skipping the structure altogether if it would force you to squeeze past it. If you cannot keep a safe walking path and full door clearance while placing the unit, choose smaller wall‑mounted or railing solutions rather than a cabinet or shelving greenhouse.
My balcony is fully exposed to wind and rain—can I still use an Ikea‑style greenhouse?
Fully exposed, high‑rise balconies push the limits of typical Ikea‑style greenhouses and lookalikes. These units are generally designed for relatively sheltered conditions. In such settings, only very sturdy frames with secure anchoring, good corrosion protection, and firmly fixed panels should be considered, and you may need extra weighting at the base or manufacturer‑approved brackets. If you cannot anchor the unit meaningfully—because of building rules or lack of suitable fixing points—the safer decision is not to install a greenhouse there and to look for alternative outdoor‑grade solutions that are explicitly designed for open exposure.
What if I only want a decorative plant display and rarely move the unit?
If your balcony is well sheltered and you mainly want a decorative display, choosing a lighter, more decorative cabinet or mini greenhouse can be reasonable. You still need a level, secure surface, enough clearance for doors or lids, and basic stability checks to ensure the unit doesn’t wobble or tip if nudged. In this scenario, prioritise appearance and compact size only after confirming that the structure meets those minimum safety conditions and doesn’t obstruct doors, windows used as exits, or the main walking path.
When do I need expert or landlord guidance instead of relying on this tutorial?
Any time you are unsure about your balcony’s structural capacity, local building rules, or what anchoring methods are allowed, you should treat this tutorial as general guidance only and defer to local expertise. Check your lease, building handbook, or strata bylaws, and ask your landlord or property manager before drilling, bolting, or adding heavy structures. For concerns about load limits or unusual balcony designs, a qualified building professional is the right person to advise; if they cannot confirm that your planned greenhouse setup is safe and compliant, don’t proceed with the installation.