
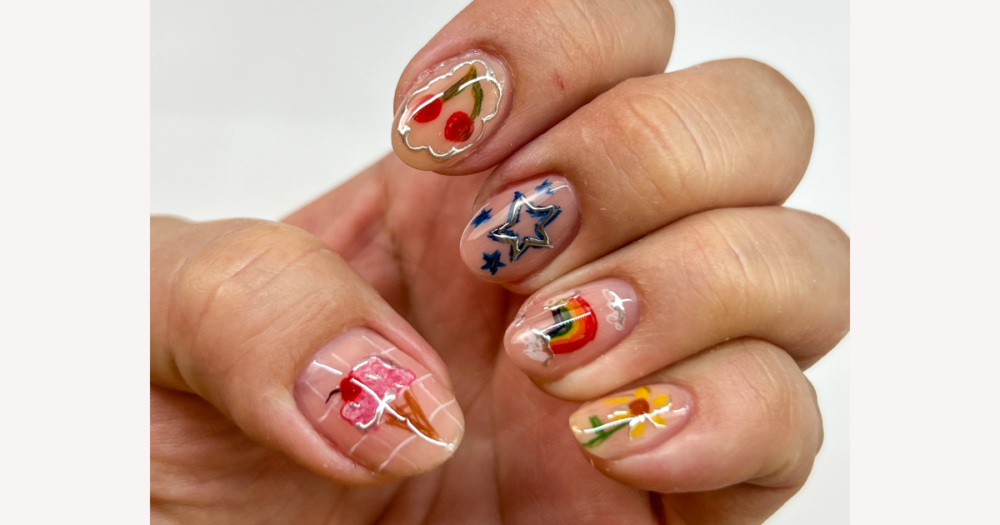
Pencil nail art on DHgate isn’t about finding one miracle pencil—it’s about choosing the right type of pencil- or pen-style tool for your nail surface and expectations. Colored pencils, nail art pens, gel pencils, and fine detailing tools can all work, but their success depends on whether they match your polish (gel vs regular vs treated bare nails), the finish (matte vs glossy), and the quality you can confirm from DHgate seller descriptions and reviews before you experiment.
What does “pencil nail art” really mean and are there any universally recommended tools?
On DHgate, “pencil nail art” means drawing or shading directly on the nail with pencil- or pen-style applicators—such as colored pencils, nail art pens, gel pencils, and other fine-tipped tools—instead of relying only on traditional brushes. These tools let you sketch lines, lettering, and soft shading in a way that feels similar to drawing on paper, but on a prepared nail surface.
There isn’t one universally recommended pencil or pen that experts agree is “the best.” Guides and marketplace results point to several workable tool categories instead: ordinary colored pencils used over matte or lightly textured nails, cosmetic nail art pens and gel pencils designed to bond to polish, and fine detailing tools that play a similar role with liquid products. Choosing among them is less about chasing a specific brand and more about matching the tool to the nail finish and your expectations for durability.
Results vary a lot with the surface and product underneath—matte vs glossy top coats, gel systems vs regular polish, or treated bare nails—and with how much trial and error you’re willing to accept. If, like me, you care most about predictable application and compatibility, it makes sense to focus on tools whose descriptions clearly mention the intended surface (for example, “matte effect,” “works over gel,” or “for natural nails”) and to read DHgate listing details and reviews carefully instead of picking the cheapest or trendiest set on price alone.
How do colored pencils, nail art pens, and detailing brushes behave differently on nails?
| Tool type | Typical behavior on nails | Precision and control | Smudging and removal | Best for |
|---|---|---|---|---|
| Ordinary colored pencils on matte or lightly buffed nails | Rely on surface texture for grip and usually give soft, sketch-like color that can look faint or crumbly, especially on smoother areas. | Moderate control for simple lines and shading; points can dull or break quickly, making tiny details harder. | Tend to smudge if rubbed and wash off relatively easily with remover, so designs are short-lived but low-commitment. | Experimental doodle-style looks, testing ideas on a matte base, and designs you’re happy to remove or redo soon. |
| Nail art pens and gel pencils for cosmetic use | Formulated to adhere better to polish or gel, with more opaque lines and colors; performance varies by product and nail system. | Fine tips support cleaner outlines and small details, though flow can swing from too runny to too dry, affecting control. | Some formulas stay crisp; others can bleed, shrink, or crack under certain top coats, so a small test patch is important. | Bolder graphic lines, quick accent details, and everyday designs when you want clearer color payoff and simple application. |
| Ultra-fine brushes and similar precision tools with polish or gel | Use liquid polish, gel, or paint rather than solid pigment, so they bond to the nail system you already use and can wear like your usual manicure. | Highest potential precision; with practice, they allow very thin lines, curves, and layered shading, but demand a steadier hand and more technique. | Smudging mainly depends on curing and top coat; once properly set, removal is like any other polish or gel and needs standard remover. | Long-wear detailed designs such as fine line art, lettering, and intricate patterns when you’re willing to invest in technique rather than a pencil format. |
Why do nail surface finish and product compatibility matter for pencil nail art?
For pencil nail art, the nail surface matters as much as the tool. Matte or lightly buffed finishes usually work better for pencil-style products because the extra texture gives dry pigments and some pen formulas more grip. On very glossy gel or top coats, the surface is slick, so colored pencils and similar tools often look faint, slide around, or break instead of leaving a clear line.
Different base products also create different kinds of “tooth.” Gel polish tends to form a smooth, durable shell that may need a matte top coat or light buffing before pencils or pens behave well. Regular polish can range from slightly textured to very glossy depending on the brand and top coat. Treated bare nails—such as nails with a ridge-filling base or a matte treatment—can offer enough texture for light doodle effects but won’t always hold complex designs. Some specialized gels or top coats are marketed as compatible with colored pencil or pen designs, yet real-world results still depend on how that product interacts with your specific tools and technique.
On a DHgate listing, the objectively checkable details are the tool’s materials (for example, cosmetic pigment vs general craft pigment), tip shape and thickness, overall size, any mention of intended finish (such as matte, gel, or regular polish), and whether the product is described as cosmetic or general craft-grade. These specs help you judge whether a pencil or pen was at least designed to work on nails or other cosmetic surfaces rather than paper or plastic alone.
What you cannot reliably know in advance is exactly how opaque a color will look on your manicure, whether it will smear under your preferred top coat, or how long the design will last before smudging or fading. Those details are highly context-dependent: they change with your base product, curing time, application pressure, and everyday wear.
Given that uncertainty, it’s sensible to favor tools whose descriptions clearly match the nail surface and finish you plan to use—especially mentions of matte or gel compatibility—and to treat performance claims as possibilities, not guarantees. Plan to test each new tool on a small area first so you can confirm how it behaves with your own nail products before relying on it for full designs.
How can you safely test a new pencil or pen for nail art on your own nails?
- Prepare one nail or a practice tip with a matte or lightly buffed area using products you already own, creating the kind of surface you expect to use for pencil nail art.
- Draw a few short lines or tiny shapes with the new pencil or pen, noting how easily it applies, whether the pigment looks even or patchy, and whether the tip feels too hard, scratchy, or unexpectedly soft.
- Let the marks sit briefly, then gently touch or lightly rub the test area to see how much immediate smudging or flaking occurs without a top coat.
- Apply a thin layer of your chosen top coat—matte or glossy—over part of the test section and watch for bleeding, streaking, shrinking, or loss of detail as it dries or cures.
- After drying or curing, assess the final look, how well the lines held up, and how easily the design removes. Use those observations to decide whether the tool suits your nail products for larger designs.
Which pencil-style nail art tool categories are worth researching on DHgate?
- Matte-compatible or art-grade colored pencils for soft, sketchy doodle effects on textured or matte nails, best when you want low-commitment designs that are easy to remove and don’t need perfect opacity.
- Dual-tip nail art pens or gel pencils that combine a fine liner tip with a broader nib, useful if you want convenient, bolder lines and stronger color payoff for quick designs without switching tools.
- Fine detailing brushes such as striping and liner brushes used with polish or gel, ideal for readers who care more about precise control, crisp lines, and durable, sealed designs than about using a literal pencil format.
- Accessory tools like dotting tools and similar small applicators that work alongside pencils and pens to create dots, accents, and simple patterns that fill out a design without complex drawing.
- Focus first on tool categories that clearly state cosmetic intent and compatibility with specific nail finishes; if you are mainly experimenting or working with kids, broader, budget-friendly mixed sets with many colors and tool types can be a reasonable starting point, even though their quality may be less certain.
What limitations and risks should you expect with pencil nail art tools?
How can DHgate-specific buyer checks help you choose better pencil nail art tools?
Can household writing tools substitute for nail art-specific pencils and pens?
Can household writing tools like regular pencils, markers, or gel pens be used for nail art instead of nail-specific tools?
Household writing tools can sometimes leave visible marks on nails, especially over matte or lightly buffed surfaces, but they’re designed for paper, not cosmetic use or nail adhesion. Their pigments and binders usually aren’t optimized to grip polish or gel, so lines often look weak, patchy, or smudge easily and may fade quickly compared with tools made for nail art. If you decide to experiment, keep it small and short-lived—try simple doodles on one nail and see how they look, whether they smear, and how easily they wash off, without expecting long-wear or perfectly crisp designs. For more predictable, repeatable pencil nail art—particularly if you care about durability and consistency—dedicated nail art or cosmetic tools such as nail pens, gel pencils, and detailing brushes are generally a better choice.