
You can start building neat, square wooden boxes with a surprisingly small set of tools, and on DHgate the real challenge is choosing accurate, usable tools from listings that vary in detail and quality. This guide focuses on a lean, box-specific toolkit and the key DHgate checks—specifications, materials, and seller signals—so you can begin with confidence instead of overbuying.
Essential starter tools for simple wooden boxes
For small wooden boxes, you do not need a full furniture shop—just a compact, accurate kit that covers layout, cutting, joining, drilling, smoothing, and clamping. I would start with layout and marking tools: a tape measure for overall dimensions, a combination square to keep corners truly 90°, and a sharp pencil or marking knife so your cut lines are thin and precise. Use them to lay out the box sides, bottom, and lid so everything matches and the box closes cleanly.
For cutting, a single reliable saw is enough at the beginning. A crosscut or Japanese-style handsaw paired with a simple miter box will let you cut box parts to length with square ends; if you already own a small circular saw and feel comfortable with it, that can play the same role as long as you can guide it straight. The saw’s job is to follow your layout lines and separate the pieces without wandering, so how you aim and support the work matters more than owning a big table saw for first projects.
Joining and drilling tools cover how the box actually holds together. A basic drill or drill/driver lets you pre‑drill for screws, hinges, and other hardware and avoid splitting the wood. A small set of 2–3 bevel‑edge chisels in widths suited to box work (for example around 6–12 mm or 1/4–1/2 inch) helps you clean up simple joints, square up corners in shallow recesses, or adjust a tight fit on a lid or hardware mortise. For simple butt‑joint boxes in softwood or plywood, glue plus careful alignment is usually sufficient; more advanced joinery can wait until you know you enjoy the hobby.
Smoothing tools turn rough parts into something pleasant to handle. A sanding block with assorted grits or a basic random orbital sander is enough to remove saw marks, erase pencil lines, and gently break sharp edges so the box feels finished. For small boxes, I would be perfectly happy starting with hand sanding only, because patience and working through the grits will give you a good surface without buying multiple machines.
Finally, clamping is what makes glue‑ups square and strong. At least four medium F‑style or bar clamps give you enough reach to pull the sides of a small box into alignment while the glue sets; you can add a couple of smaller clamps for holding parts during drilling or chiseling. If I were buying for box‑making on DHgate, I would put most of my early budget into accurate layout tools and enough clamps rather than specialty gear like planes, routers, or a table saw—those become interesting later, but they are not required for neat, functional beginner boxes. Safety gear such as eye protection, hearing protection, and a dust mask is assumed as part of any woodworking setup, but this guide focuses on the core tools and how they serve box‑specific tasks.
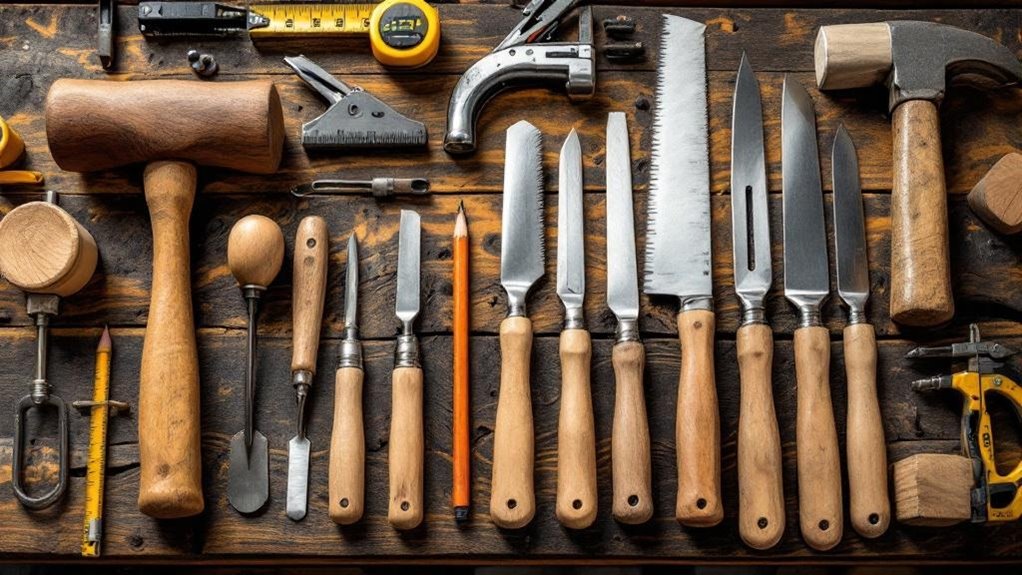
A compact beginner woodworking kit laid out on a workbench, showing a tape measure, combination square, handsaw, chisels, clamps, a drill, and a sanding block arranged within easy reach to cover basic box-making tasks.
How each tool fits into the box-making workflow
- Measure and mark box parts: Use your tape measure to decide the height, width, and depth of the box, then a combination square and sharp pencil or marking knife to lay out matching sides, bottom, and lid lines so every piece is consistent and corners will be square.
- Cut sides, bottom, and lid: Follow those layout lines with a crosscut or Japanese handsaw guided in a miter box, or with a small circular/jigsaw if you already own one, checking each cut with the square to catch any out-of-square ends before moving on.
- Assemble and clamp the box: Spread wood glue on butt joints or simple joints, bring the sides together, and position clamps so they pull the corners into alignment; use chisels beforehand to knock down high spots or slightly adjust edges so the joints close without gaps.
- Drill for screws or hardware: With a drill or drill/driver and suitable bits, pre-drill pilot holes for screws, hinges, latches, or small handles, keeping holes straight and appropriately sized so hardware seats cleanly without cracking the wood.
- Sand and ease edges: Use a sanding block or simple sander to smooth all surfaces, remove pencil marks, and gently round over sharp corners; on small boxes, patient hand sanding can fully replace powered sanders as long as you work through progressively finer grits.
Choosing between hand-tool and power-tool starter paths
| Starter path | Core cutting and sanding tools | Cost and setup | Noise and dust | Precision and control for box-sized pieces | Best suited beginner priorities |
|---|---|---|---|---|---|
| Hand-tool-focused | Crosscut or Japanese-style handsaw with a miter box for straight cuts; hand sanding block with sheets of sandpaper. | Lower upfront cost, minimal need for dedicated shop space, and very simple setup—you mainly need a sturdy surface and basic storage. | Very quiet and low dust; good for apartments or shared spaces where power tool noise would be a problem. | High tactile control and easy to keep cuts slow and deliberate; with good layout and clamping, you can achieve very clean, square boxes, though repetitive cuts take more effort. | Best if you prioritize low budget, quiet working conditions, and learning fundamentals of measurement and control over speed. |
| Power-assisted | Small circular saw or jigsaw for breaking down stock and cutting sides, plus a random orbital sander or similar for smoothing surfaces. | Higher overall cost and more setup considerations—extension cords, safe cutting area, and a place to store tools—but still manageable for home use. | Noticeably louder and more dust-producing; you may need basic dust masks and to think about noise for neighbors or family. | Faster cutting and sanding once you learn to guide the tools; accuracy is good for box-sized pieces but requires attention to setup, support, and feed rate. | Best if you value faster progress, have some space for noisy tools, and already own or feel comfortable with DIY power tools, while accepting a steeper learning curve and extra safety habits. |
Key tool specs and materials to check on DHgate
| Tool category | Key spec to check on DHgate | Beginner-friendly range or cue | Impact on small box projects |
|---|---|---|---|
| Saws | Blade length and tooth pattern (TPI or description such as crosscut or fine-cut). | Moderate blade length around 10–14″ with finer teeth or a crosscut pattern for smooth cuts in thin boards. | A blade that is long enough to track straight but not so heavy that it feels unwieldy makes it easier to cut box sides and lids accurately with cleaner edges. |
| Chisels | Width of individual chisels and overall set composition. | A small set around 6–12 mm plus one wider chisel lets you handle joints, hinge recesses, and general cleanup without excess bulk. | Chisels sized close to the joints and recesses you’re cutting give better control and reduce the chance of overcutting delicate box parts. |
| Clamps | Jaw opening and throat depth (how far the jaw reaches in from the edge). | Jaw opening that comfortably spans your typical box width and height, with enough throat depth to reach past the edges; at least four clamps of this size. | Clamps that can reach around the whole box, not just the very edge, hold glue joints evenly, helping corners stay square and preventing gaps as the box dries. |
| Drills and drivers | Chuck size and bit compatibility; variable speed or torque settings. | Chuck sized for common wood bits and driver bits (often 3/8″ or 1/2″), with variable speed to start holes slowly and drive screws without stripping. | A drill that accepts standard bits and can run slowly gives cleaner pilot holes and better control when adding hinges, latches, or hardware to small boxes. |
| Sanding tools | Pad or block size and how sandpaper is attached. | Pads or blocks sized close to the surfaces of your boxes, using standard sheet or hook-and-loop sandpaper so replacements are easy to find. | Appropriately sized sanding tools let you smooth faces and edges evenly without tipping or leaving grooves on small parts. |
For blades and cutting edges on small box projects, materials like high-carbon or tool steel are useful cues that the saw or chisel should hold a sharper edge for longer and feel more predictable as you work. On clamps, solid metal components in the screw and jaws help them apply even pressure without bending, while handles made from hardwood or durable synthetic materials give you better grip when you tighten them.
DHgate listings sometimes describe materials and specs in broad or marketing-heavy terms, so it’s important to look for concrete details: clear dimensions for blades, jaws, and handles, photos that match those written measurements, and specific mentions of steel type or handle material rather than only phrases like “high quality” or “professional.”
Because you cannot assume every listing is fully verified, treat specs as information to cross-check: compare text to photos, confirm that sizes make sense for the boxes you plan to build, and favor listings that spell out material types and measurements over those that stay vague. This makes it more likely that the tools you receive will feel controllable and durable on small box projects, even though individual listing claims cannot be independently confirmed here.
Risks and limitations when buying woodworking tools on DHgate
DHgate buyer checklist for box-making tools
- Check seller reputation. On DHgate, look at the seller’s overall rating, the number of completed transactions, and the tone of buyer feedback, paying attention to comments about tool accuracy, durability, and whether items arrived as described.
- Review the product description in detail. Confirm that full dimensions, materials, compatible bits or accessories, and intended use are clearly listed and make sense for small box projects—for example, clamp jaw depth that matches your typical box height and saw teeth described as fine or suitable for thin boards.
- Inspect listing photos for usable scale and detail. Prefer tools shown from multiple angles, with close-ups of cutting edges, clamp jaws, and handles, plus some indication of size (such as a ruler, hand, or comparison object) so you can judge reach and overall bulk against the boxes you plan to build.
- Confirm shipping terms before you commit. Note shipping cost, estimated delivery time, and any mention of packaging or protection, and decide whether the timing and total cost fit your project schedule and budget for getting your box-making tools in good condition.
- Verify transaction safeguards. Use payment methods supported by DHgate itself rather than going off-platform, read the basic return and refund conditions on the listing, and familiarize yourself with how DHgate’s dispute process works so you know what to do if your tools arrive damaged or noticeably different from the description.
Your minimal first-purchase bundle for box-making
Optional upgrades and specialized box-making tools
Once you have a lean starter kit, the more advanced tools you see in box-making videos become optional upgrades rather than necessities. Small routers or laminate trimmers can cut decorative edges, grooves, and box joints with more precision and variety, making it easier to add inlay details or sliding lids without relying only on saws and chisels.
A table saw with box-joint or crosscut jigs speeds up repeatable cuts for multiple boxes and keeps dimensions extremely consistent, which is helpful if you move into small production runs. Smoothing planes can leave a finer surface straight off the tool than sanding alone, and dovetail-specific saws make traditional dovetail corners cleaner and more predictable once you’re comfortable with that joinery style.
Micro-adjust marking gauges and dedicated box clamping systems mainly improve alignment and repeatability: they help you lay out joints with very consistent spacing and hold complex glue-ups square with less fuss. I would treat all of these as aspirational tools—useful once you’ve built a few boxes and can clearly see where your current kit feels slow or imprecise. For a first set of boxes, you can build attractive, functional projects with the basic tools alone and only invest in upgrades after you know you enjoy box-making and have specific limitations you want to overcome.
Quick answers to common beginner tool questions
Do I need different tools for hardwood versus softwood boxes?
You can use the same basic tool types for both—saws, chisels, drills, clamps, and sanding tools—but hardwood demands sharper, more controlled cutting. Finer-tooth handsaws or well-sharpened blades leave cleaner edges in hardwood, and carefully honed chisels are less likely to crush or tear the fibers. For your first boxes, focus on keeping whatever tools you have sharp and taking lighter cuts when you move from softwood to hardwood.
How many clamps do I realistically need for a small box?
For a single small box glue-up, about four medium clamps are a practical minimum: one on each side so you can pull the corners into alignment and keep the box square while the glue sets. As your boxes get larger or you start gluing more than one at a time, extra clamps help you apply pressure more evenly and handle multiple projects without waiting for glue to dry between steps.
Is a cordless drill necessary if I already own a corded drill for box-making?
A corded drill is generally fine for beginner box projects as long as you can control the speed and reach your work area comfortably. Paired with suitable wood bits and driver bits, it will drill pilot holes and install screws and hardware effectively. A cordless drill mainly adds convenience—easier maneuvering around small parts and fewer cords to manage—so it’s an upgrade for comfort rather than a requirement for your first boxes.